

Learn how to create more than 30 email aliases in Google Workspace
If you’re a Google Workspace admin, you probably know that Google Workspace allows you to create only up to 30 email aliases for each user. But, what about when you need more than 30 email aliases?
In this post, I show you how to create more than 30 email aliases in Google Workspace. This can be 2,000 or even 50,000 email aliases for any user in Google Workspace.
For starters, email aliases work in such a way that if your primary email is yourname@yourdomain.com, you can create an email alias with sales@yourdomain.com.
When an email is sent to your email alias, you receive it in your primary email. You can also send emails from these alias ids right from your primary mailbox.
So as a Google Workspace admin you can create these email aliases for your users. This can also be a smart way to create additional emails for free without paying extra in Google Workspace.
Watch a step-by-step video guide above, or you can continue reading for further instructions.
1. Go to Google Workspace admin console

So first login into your Google Workspace admin console by clicking on ‘Admin’ icon (see screenshot above).
2. Go to 'Apply one-to-one mappings
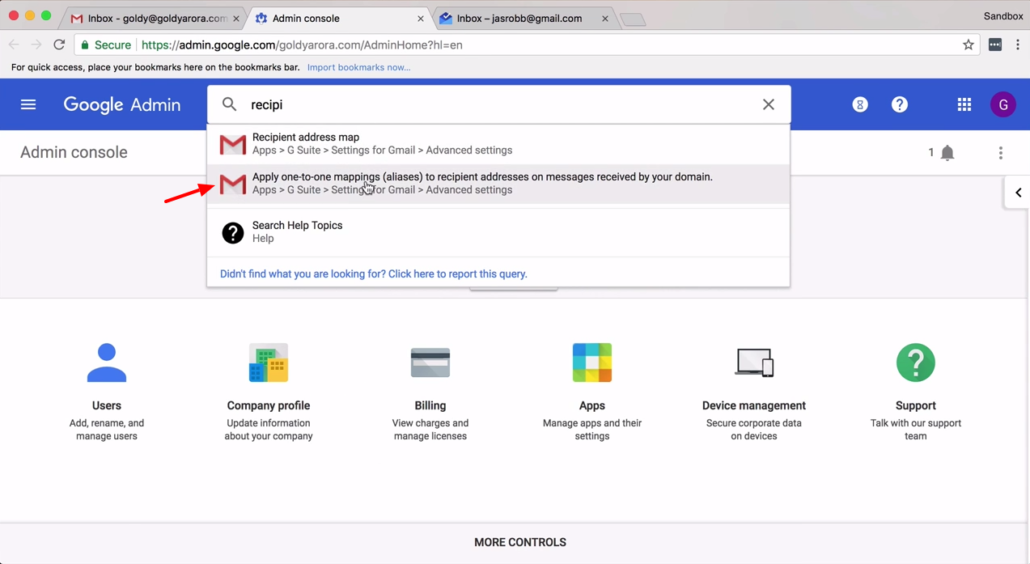
From admin console, type ‘recipient‘ in the search bar. Then, click on ‘Apply one-to-one mapping‘ from the list of search items that show up.
We shall be using recipient address mapping. So what this does is; you have alias which you can map to a given user as you’ll be seeing in our next steps.
3. Click 'Configure'
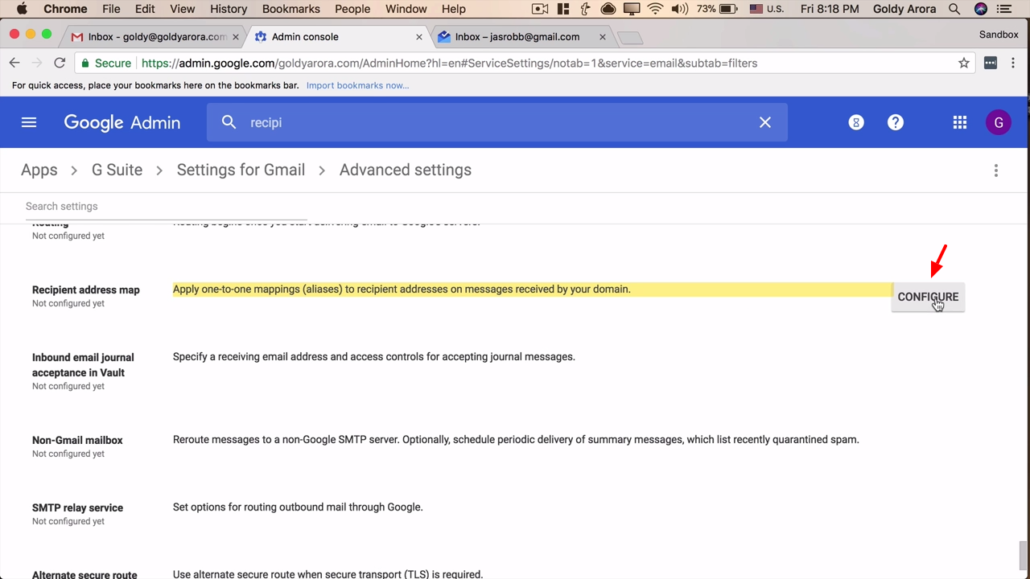
From the next page, click on ‘setup‘ from the ‘Recipient address map‘ section.
4. Setup Recipient address map
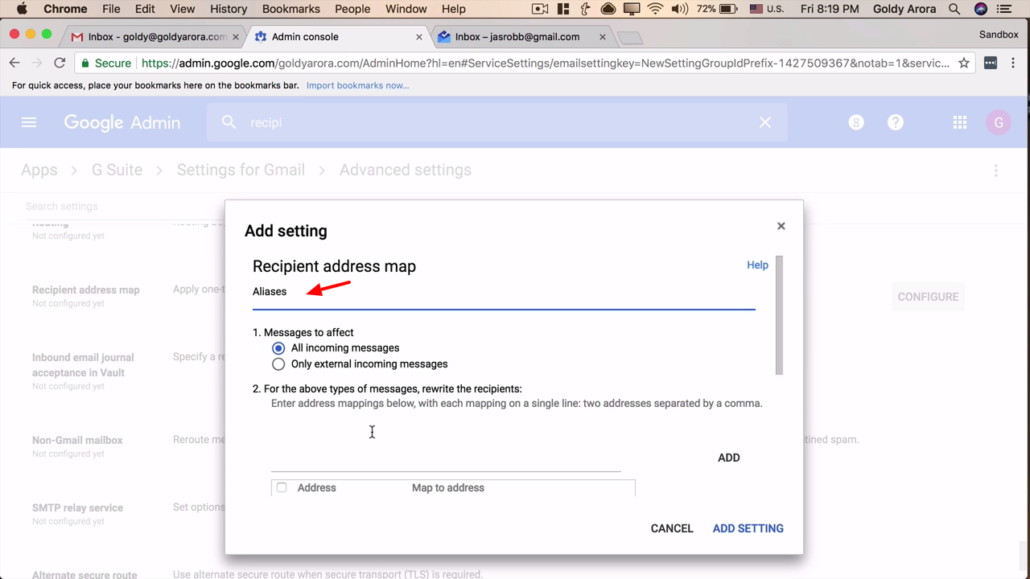
Next, with this form we are going to setup recipient address map. In the first filed, you get to add a description which will appear within the setting’s summary. In my case I will type ‘aliases’, but you can type something more descriptive.
Then under ‘Message to affect’ section, you can choose which emails to apply settings to. ‘All incoming messages’ which means both internal and external emails coming to your domain or ‘Only external incoming messages’ .
5. Prepare email aliases
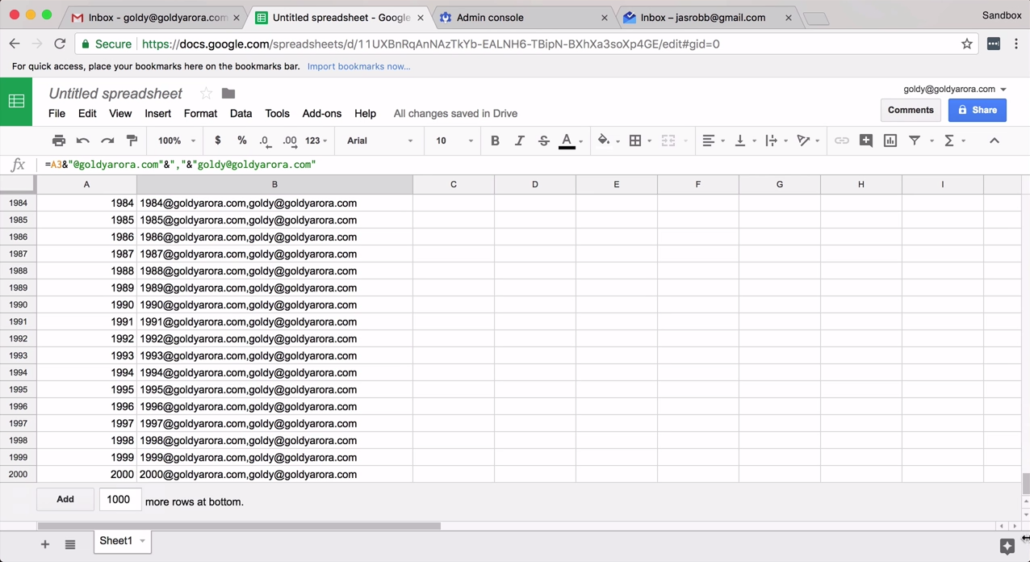
The next part of the form is where we do address mapping. Every mapping must have two addresses. An alias on the left and a map-to address on the right separated by a comma.
For instance, ‘100 at goldyarora.com,goldy at goldyarora.com‘ where the first address is the email alias followed by a primary email address I’m mapping an alias to separated by a comma (,) and must be on a single line.
6. Copy address mapping
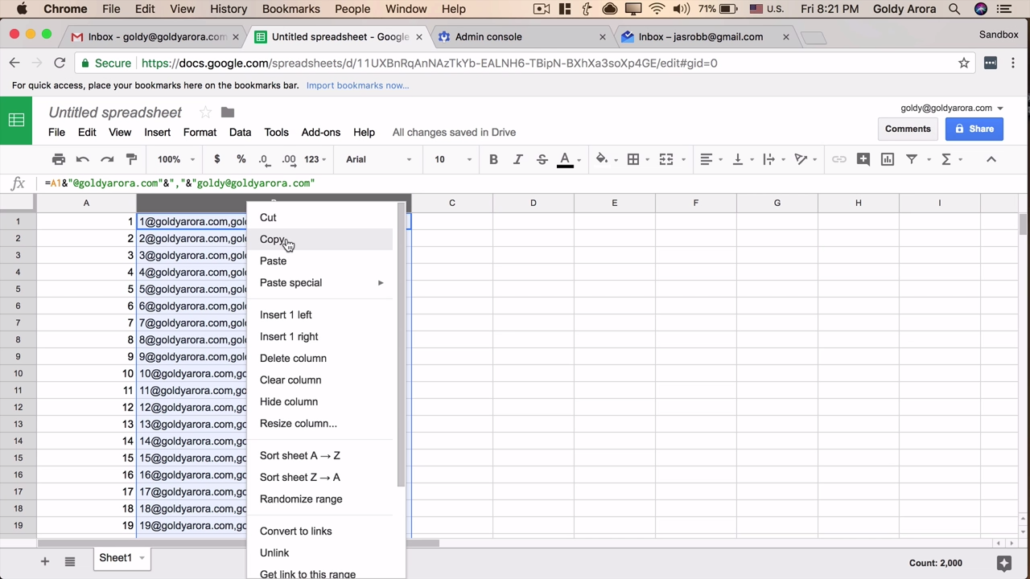
Now that you’ve prepared your mappings, it’s time to copy paste them into Google Workspace.
The maximum number of mappings you can submit to Recipient Address Mapping is 2,000. So if you for instance need to add 4,000 aliases for a user, just go ahead and create two separate tables of 2,000 address mappings each.
7. Add address mapping
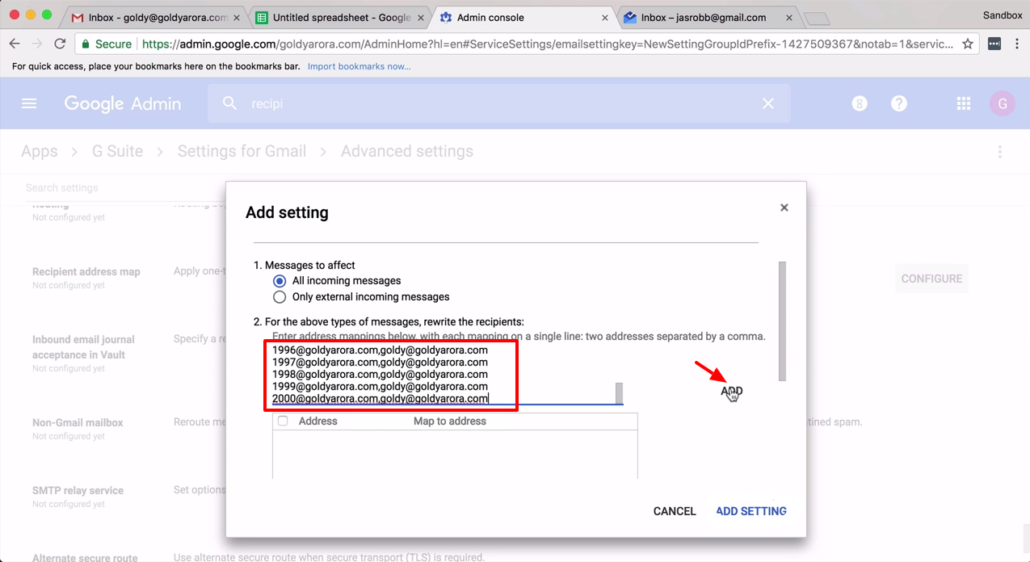
Next, paste address mapping from previous step into Google Workspace then click “ADD”.
8. Save settings
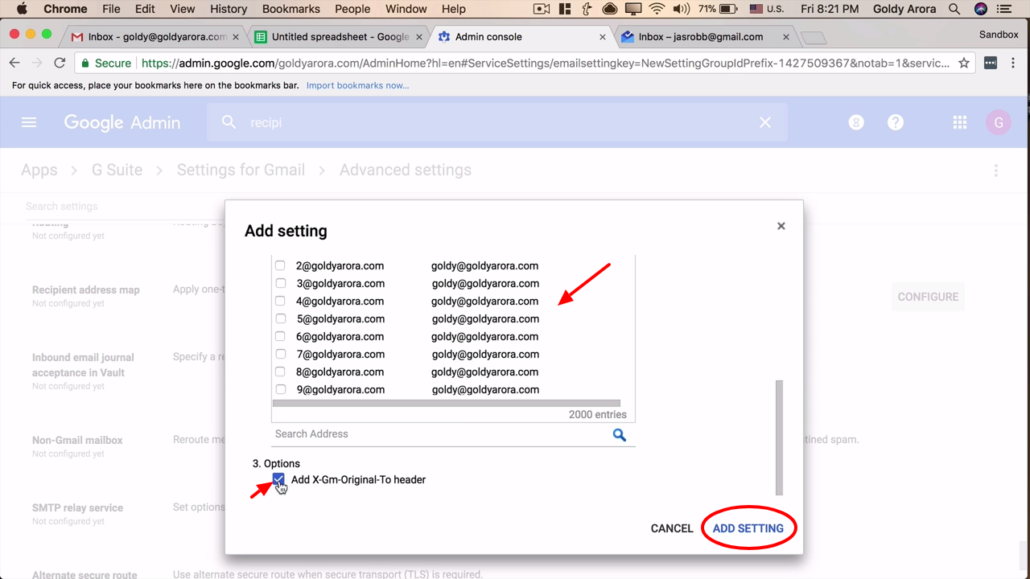
After ‘ADD’ing mappings, next you can check ‘Add X-Gen-Original To header’ in case you want the recipient to be able to check which email address the message was sent to.
Next, click on ‘ADD SETTING’ link to save your aliases.
Testing created aliases
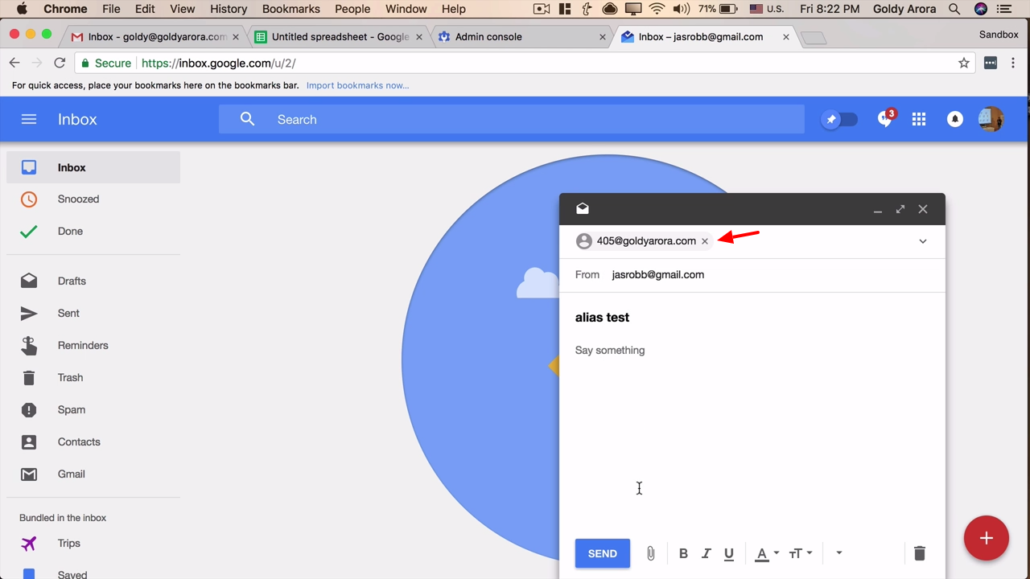
Just to make sure things are working as expected. In my case, I randomly choose to send an email to email alias 405 at goldyarora.com from my personal email address just to test out.
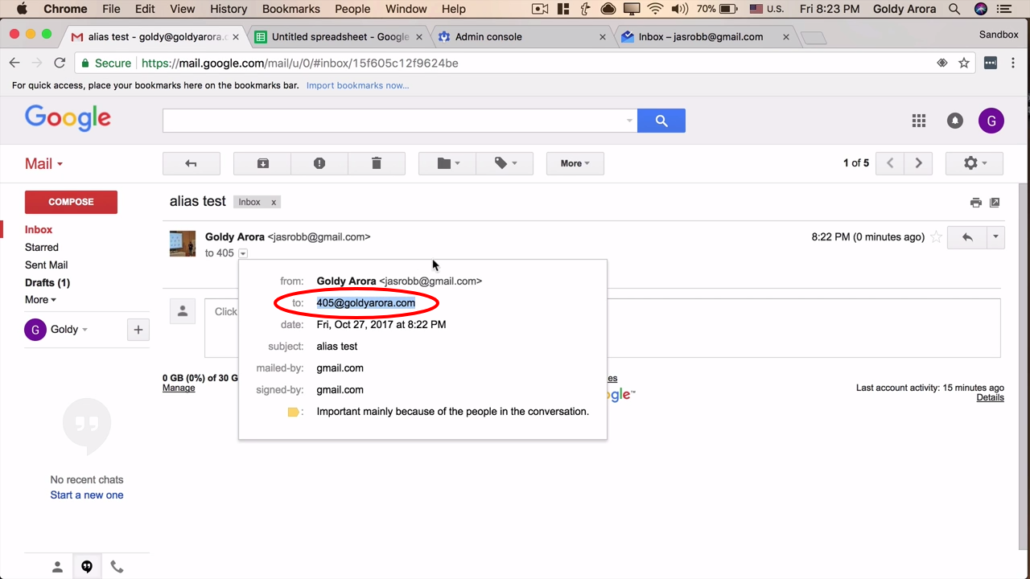
As you can see, email was well delivered to my primary email address ‘goldy at goldyarora.com‘ and I’m able to check headers to see which email address the sender sent the email to.
Gmail Send-As Setup

You can go ahead and setup Gmail Send-As by going to Gmail Settings, then Account, then Add another email address to be able to compose and reply to emails using your newly created email aliases. Here’s a detailed guide on how to correctly setup Gmail Send-As feature, be sure to check it out
In conclusion
So there you have it. You are not restricted to a maximum of 30 aliases in Google Workspace. As you’ve seen, you can very well create thousands of aliases for your Google Workspace users following steps described in this guide.
If you have any questions or comments, feel free to give me your thoughts in the comment section below and I’ll be glad to respond to you.
Related Posts
....