

Gmail Language Filter to Block Russian language Spam Emails
In case you prefer videos, here is a step by step video to guide on how to create Gmail language filter. Otherwise, continue reading for textual instructions.
1. Login to Gmail Admin Console
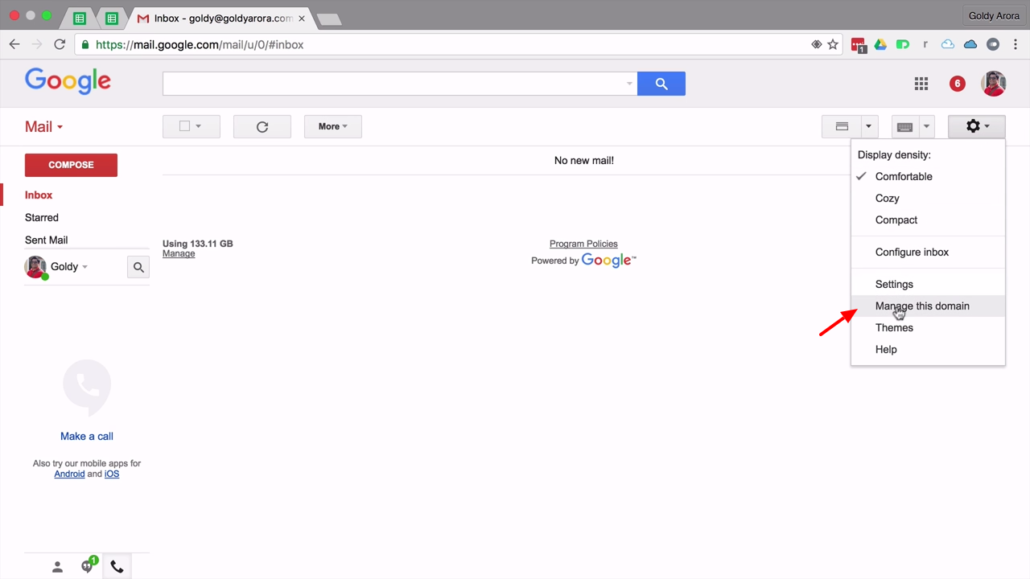
Login to your Google Workspace admin console by clicking on ‘Manage this domain’ option from Gmail settings option. You can also login using one these ways.
2. Search ‘content’
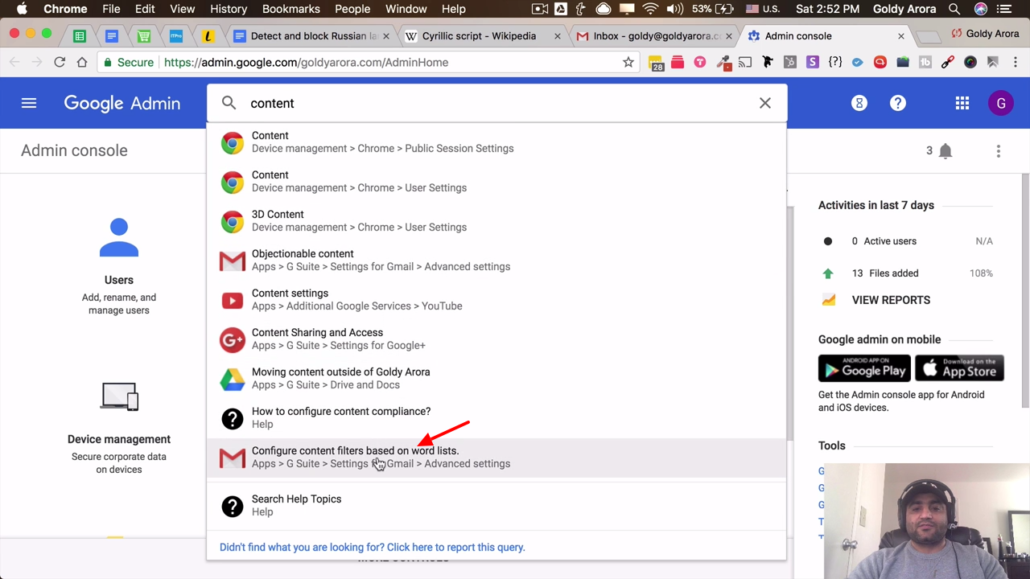
Using admin search bar, type ‘content’ to find content filters configurations. From the search result, click Confituer content filter basedon word lists’ option.
3. Add another content compliance
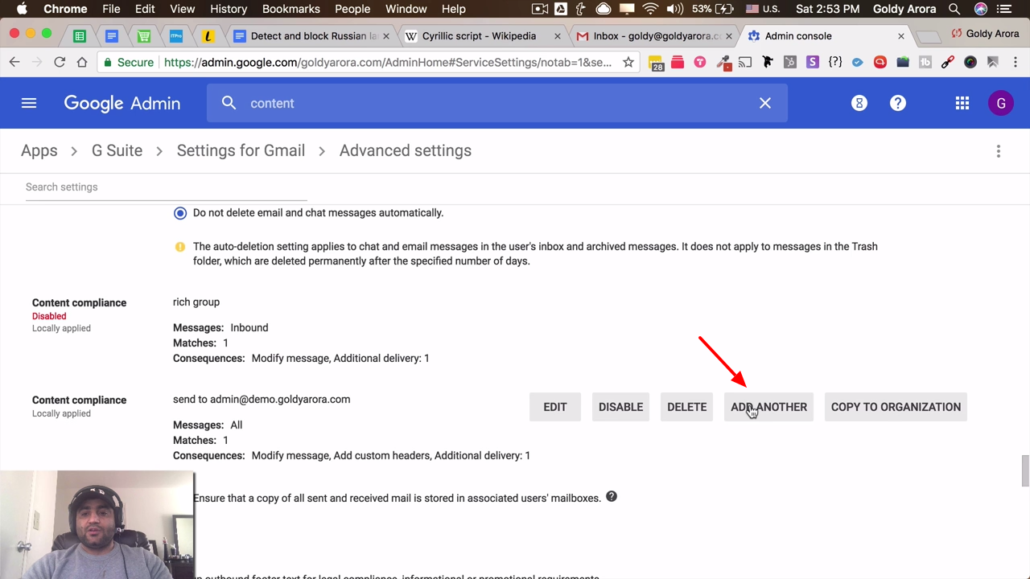
Next, scroll down the page and locate ‘Content compliance’ section, then click on ‘Add another’ button. This gives you a form that lets you create a filter.
4. Add Content Compliance settings
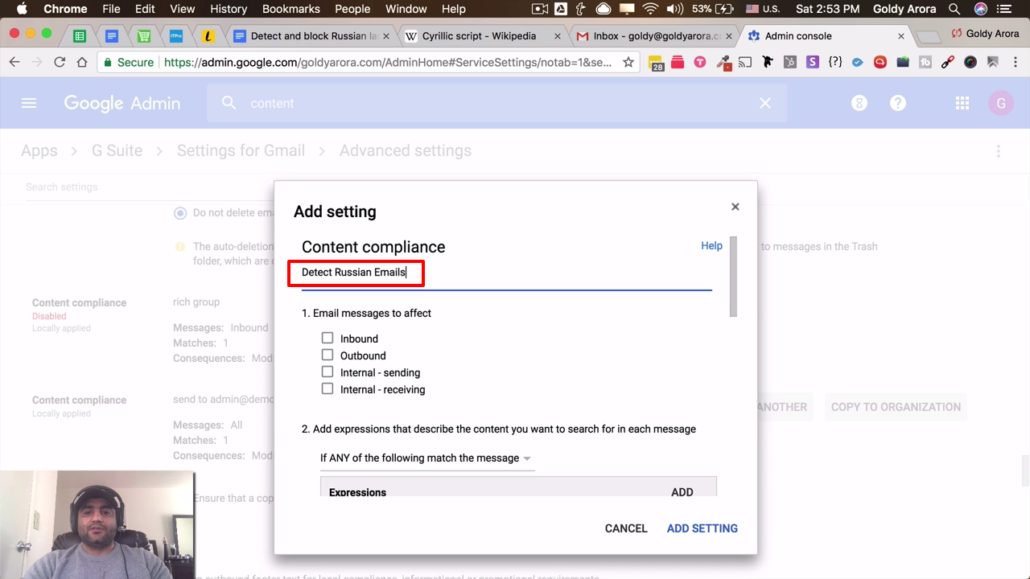
In the very first field of the form you type a short description. This is required as it will appear within the settings summary.
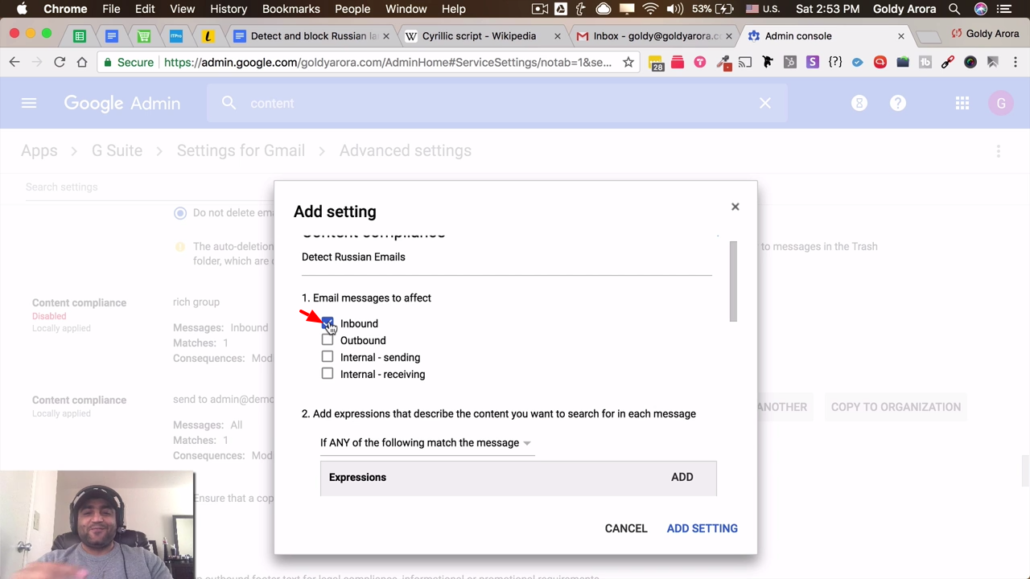
In part one of the form you get to choose which email messages to affect. Choose ‘Inbound’ because since you’re looking to detect external messages being sent to your domain.
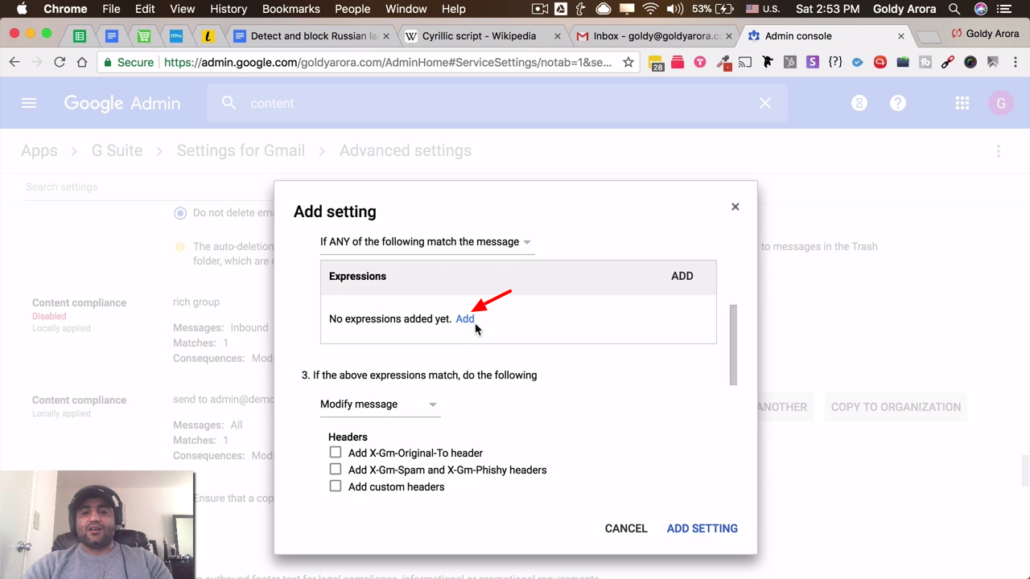
Under Expression, click on ‘Add‘ then follow the next steps to add a new expression.
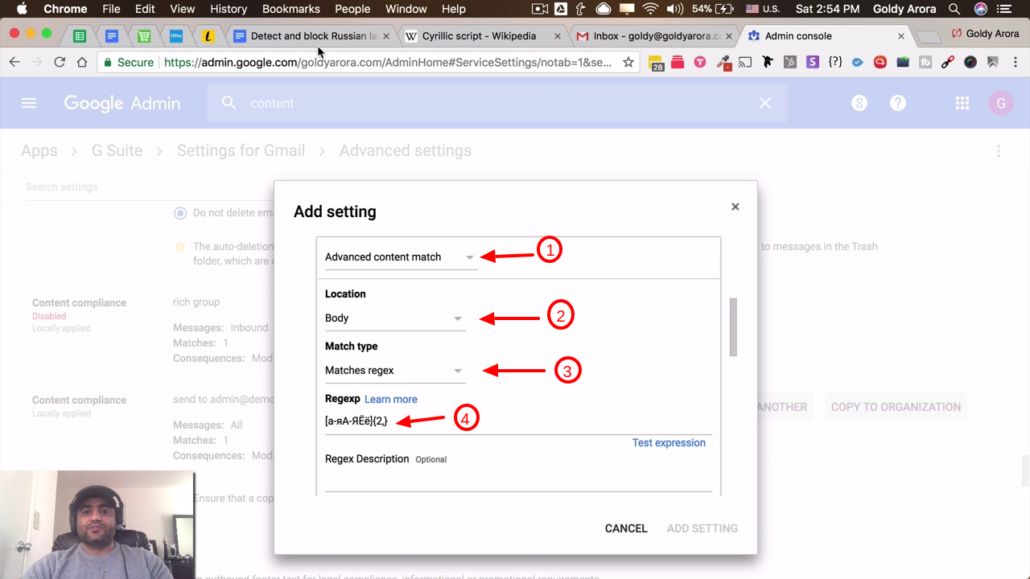
- Under ‘Expression‘ choose ‘Advanced content match’.
- Then choose ‘Body’ as location since it’s in the body of an email you’d usually find the Russian characters.
- Match type choose ‘Matches regex’ .
- Copy and paste “[а-яА-ЯЁё]{2,}” which is a regex express to detect Cyrillic characters.
You may go ahead and test the expression with some Russian text. After which you click ‘Save’ button to save your expression.
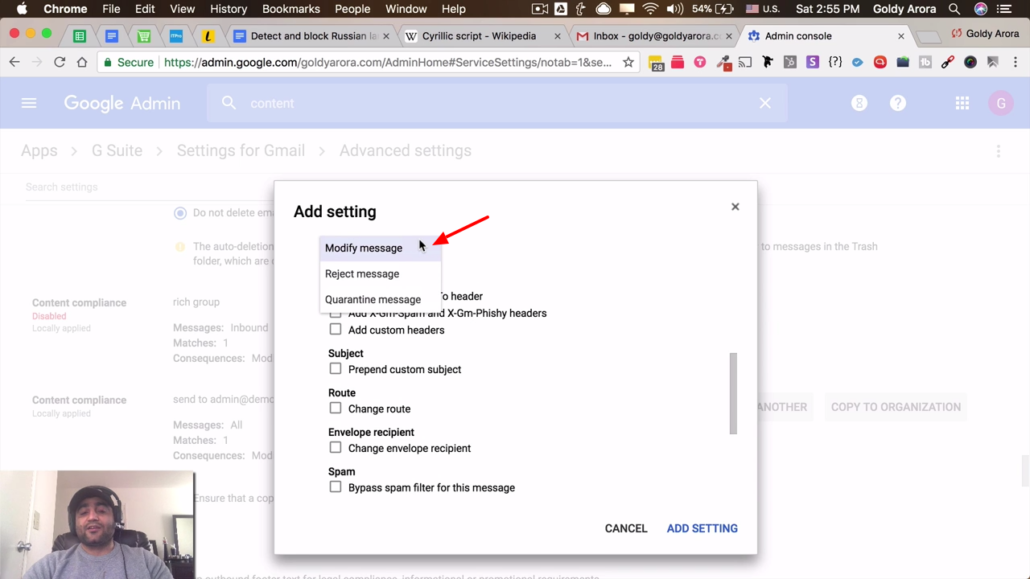
In this part of the form, you get to choose which action should happen to these kind of email messages.
You may choose to reject, quarantine or modify message. In my case I would like to modify. This lets my users organize and dispose off these emails easily.
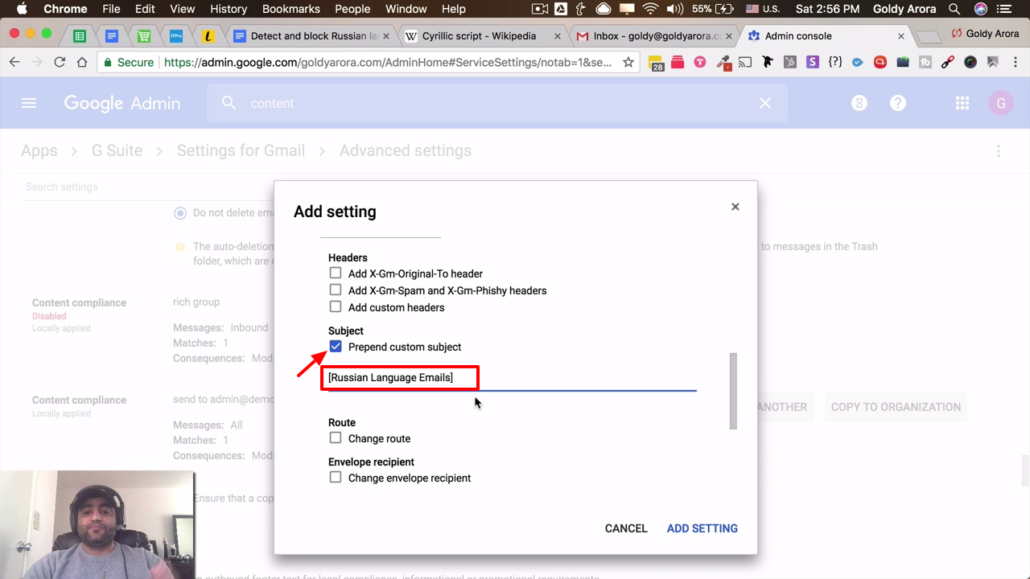
Check ‘Prepend custom subject’ then type a subject you would want to be prepended to all emails Russian emails sent to your domain.
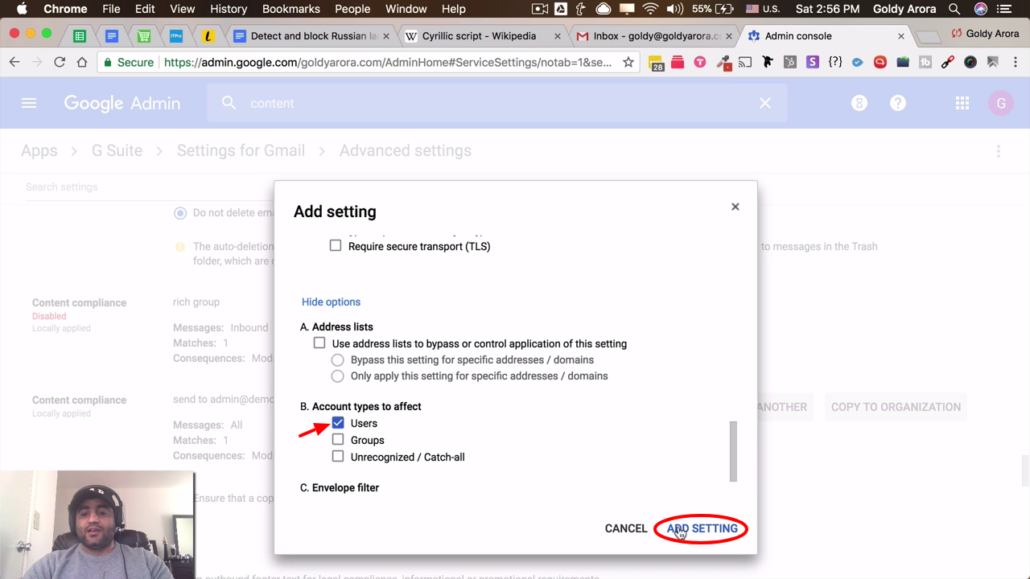
Just make sure these settings apply to all users, then click ‘Add Settings’.
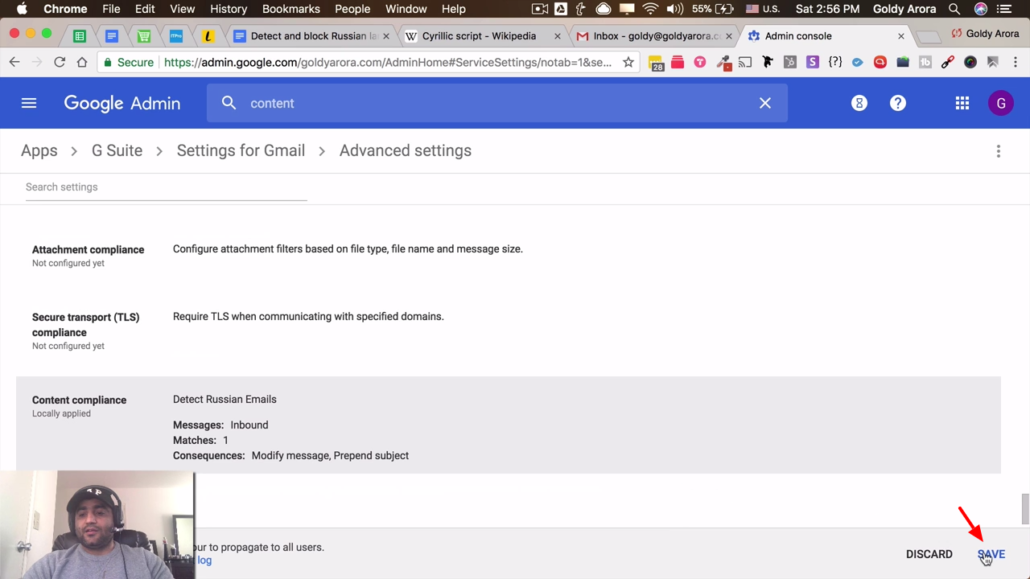
Don’t forget to click ‘Save’ button to save your content compliance changes.
5. Testing new filters.
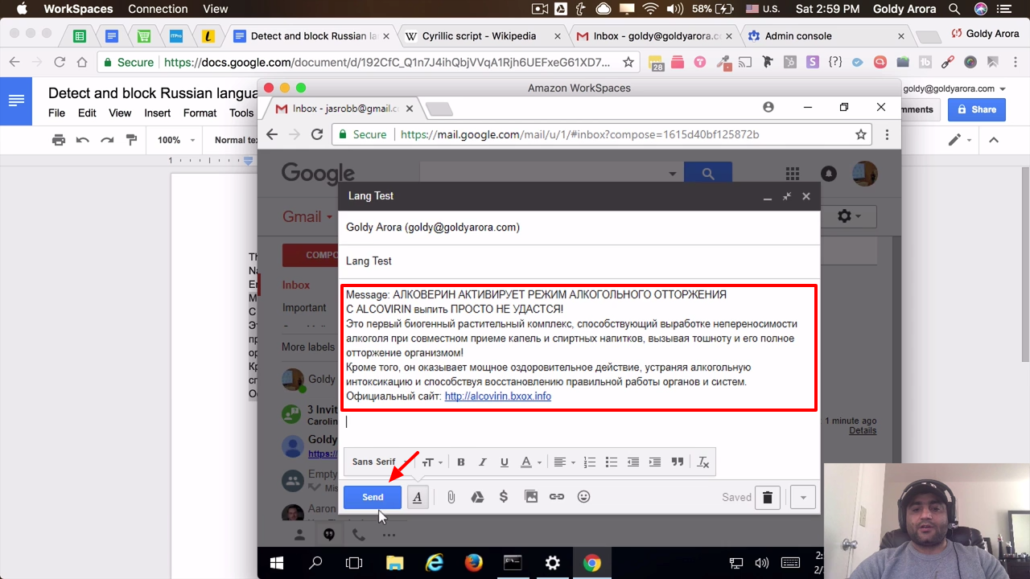
So to test out our new content compliance settings, I send myself an email containing Russian characters in the body.
According the rules we just set up, this email’s subject title should be prepended with [Russian language emails] prefix.
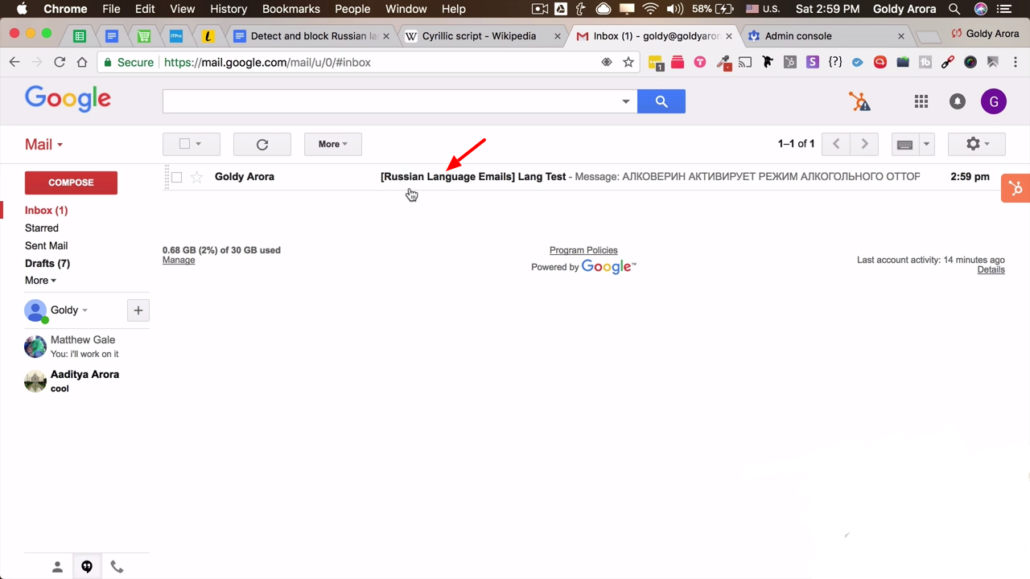
As you can see, such emails now get prefixed with an identifier in their subject. With this, my users can now further create filters in Gmail based on the email subject as you are about to see below.
6. Create Filter with Subject match
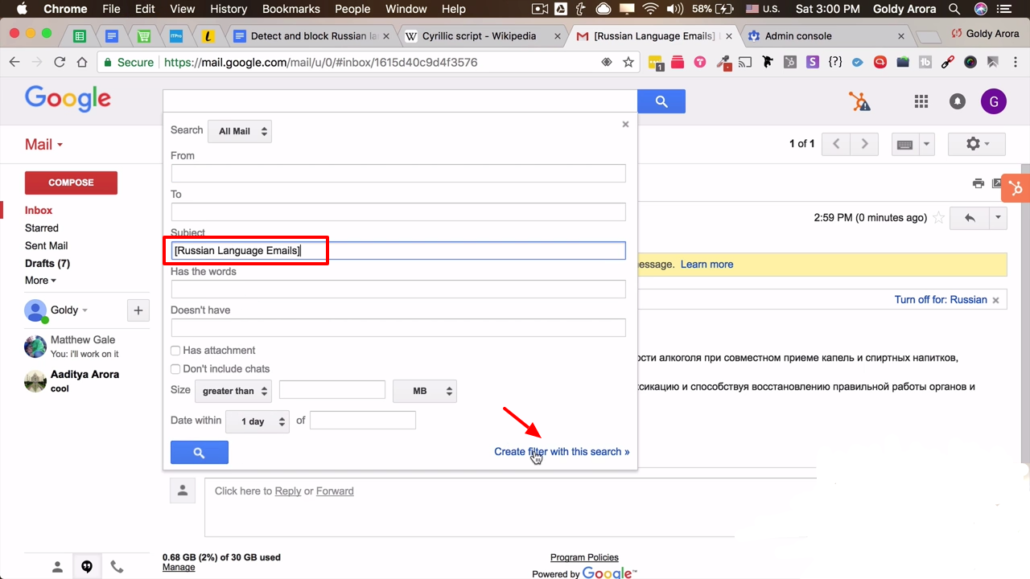
To create a filter in Gmail, simply click on the drop-down arrow in the search bar. Then paste the subject prefix expected to be appended to Russian emails in the Subject field.
Click ‘Create filter with this search’ link.

Next, choose ‘Skip the inbox’ to prevent these emails from landing directly to your inbox.
Then click ‘Apply the label‘ choose or create a label. then click Create filter button to save the filter
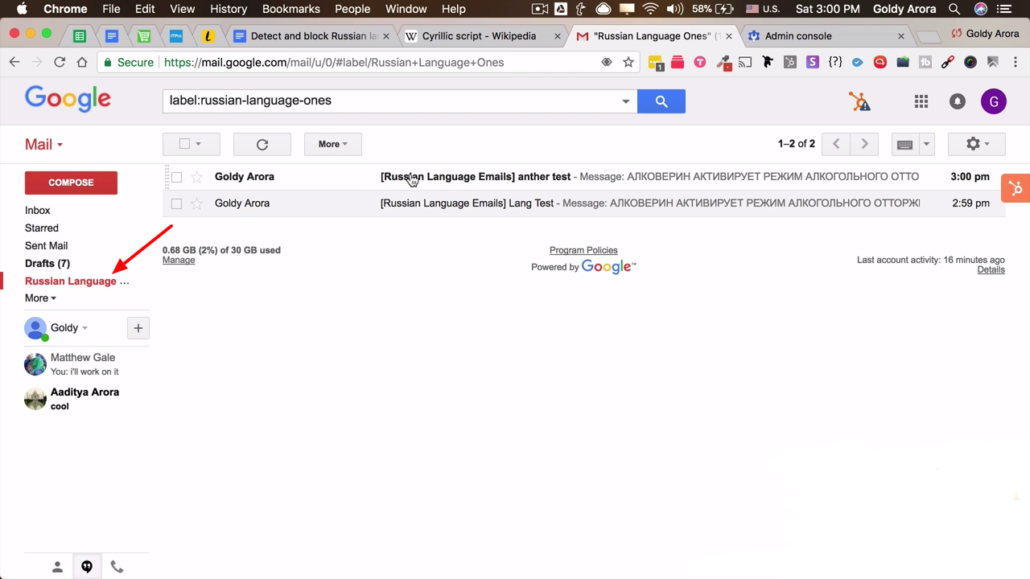
That is it! Now when Russian emails are sent, they go to ‘Russian Language’ Label which lets a user quick skim through them just if there might be a genuine Russian email.
I hope you found this helpful, in case you have any questions or comments, don’t hesitate to leave them in the comment section below.
Related Posts
....