

Google Cloud Identity Setup - Step by Step setup for Google Cloud Identity free
Hey fellow Google Admins. This is Goldy again. Welcome back to Google Cloud Identitycourse and in this video, I'll show you how you can do Google Cloud Identity setup if you plan to use Google Cloud platform or maybe any other Google enterprise product or service.
First, let me show you couple of slides to answer some of the basic questions that you might have when you start doing this set up, and then I'll share my screen to show you the live demonstration where I'll take my demo domain and set it up with Google Cloud Identity.Let us start with Cloud Identity set up. But before that a few questions,first one is to understand sign up flow.
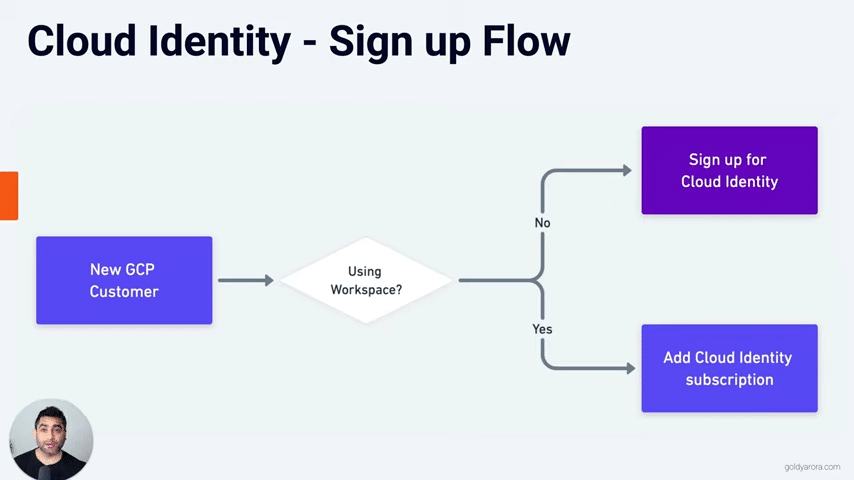
In case if you're already using Google Workspace, you can skip watching this video and rather watch my other video, which I'll add somewhere here, which shows you how you can simply add cloud identity to your existing Workspace subscription.
However, in case if you do not use Google Workspace or you're not planning to use it (e.g you use Office 365 or something else), on the other side, you plan to use Google Cloud platform, Google Analytics, or any other Google Enterprise service, then this video is for you.Because in this, we will sign up for Google Cloud Identity from scratch.You might also have a question on whether it will impact your existing setup in some way.

The answer is No, it will not impact your system in any way. It is just an addition of a record in your DNS, and that is it.Now, there are a couple of watch points when you register cloud identity for your domain. The first one is banned domains.Google does not allow you to use Google or any of the Google trademark, so make sure that Google name is not part of your domain.
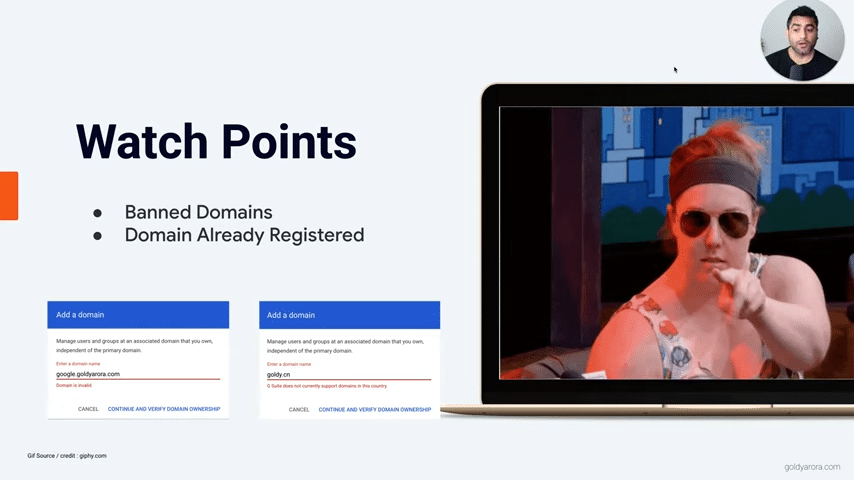
Second, Google does not support China top level domain, so your domain can't have seen .cn extension.Okay, now there are multiple options available for your domain verification as you see below.

You can go with Google Analytics, you can upload HTML file, However, I personally find DNS record addition really easy, and that's why I'm just recommending it. You should go with either the TXT record or you can just create a CNAME record in your domain DNS.Now, where should you make the changes?
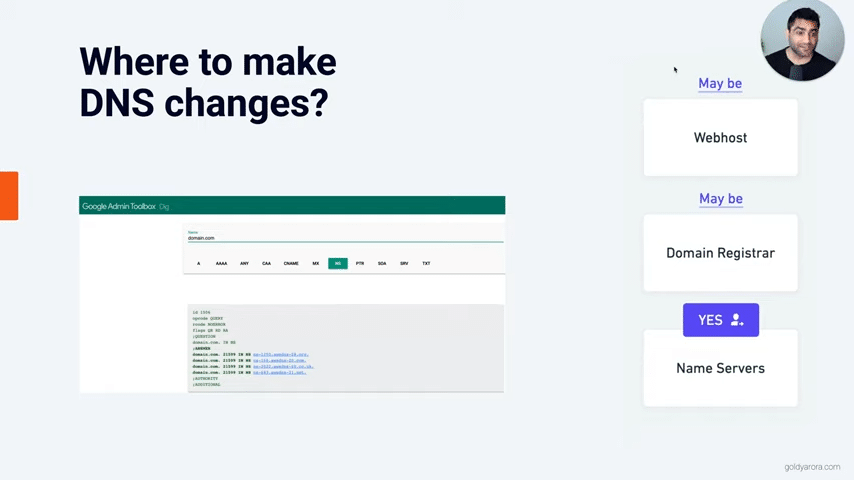
In case if you are a large organization you already figured it out, but in case if you're a small business, I've seen sometimes customers are making the changes at a place where they don't have their name servers, so make sure that you check where your name servers are residing, whether it's with your domain registrar or with your web host, wherever your name servers point, you should be making these DNS changes at that place.Okay, now one more thing before we go to the set up.
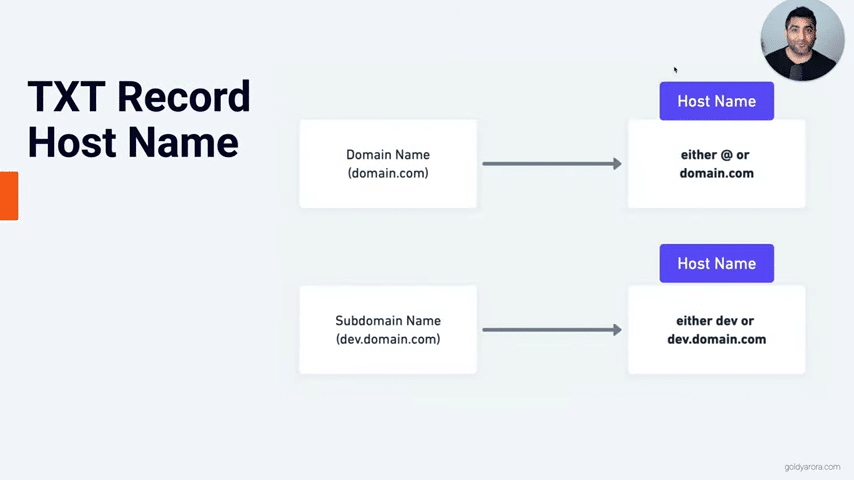
Your hostname for this TXT or CNAME depends whether you are setting up Google Cloud Identity on your domain or subdomainIn case you're setting up Google Cloud Identity with your primary domain (e.g goldyarora.com), then your host name for the TXT should be either @ sign or the domain name (e.g goldyarora.com) depending on how your DNS provider takes it.
However, if you are signing up for Google Cloud Identity on a subdomain like dev.goldyarora.com,for that TXT should be either dev or the dev.goldyarora.com based on again how your DNS takes it.
I personally recommend not to go with subdomain unless you have a very strategic reason in place, and I've created one more video comparing both of these options in detail.Now, I'll show you how you would setup Google Cloud Identity with your primary domain (e.g goldyarora.com).
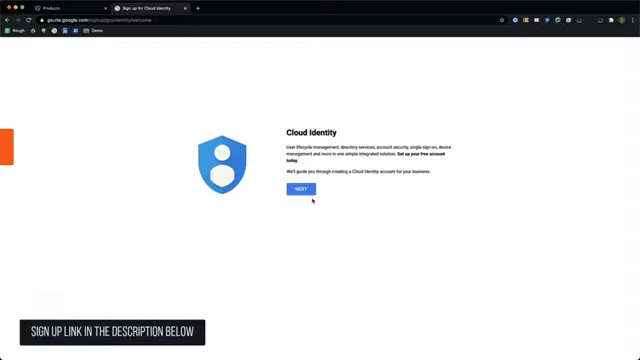
First, you would go to the Google Cloud Identity free sign up page.
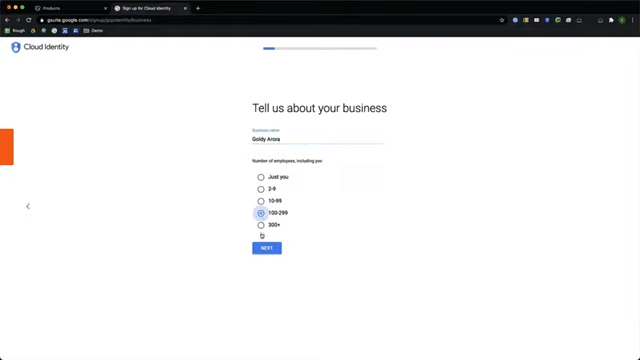
I will need to provide my business information. I'll go ahead and put that information and click next.
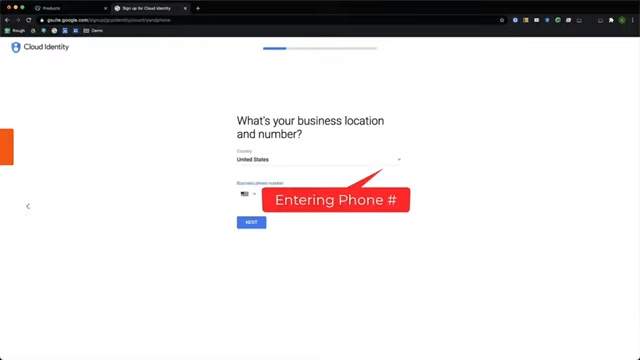
I will enter my phone number here (in some cases Google might send the SMS to this number to verify your identity.
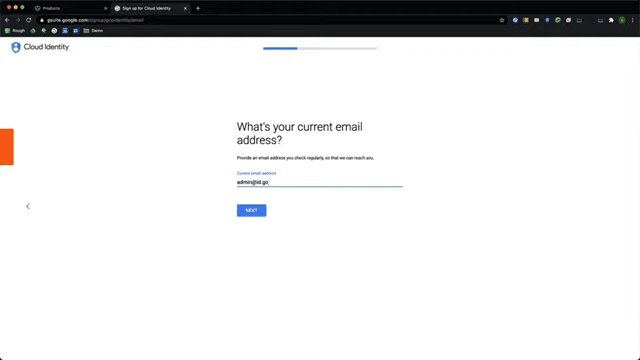
Here I will provide my current email address on which I can receive emails, this will also be helpful for password recovery if I forget my password.
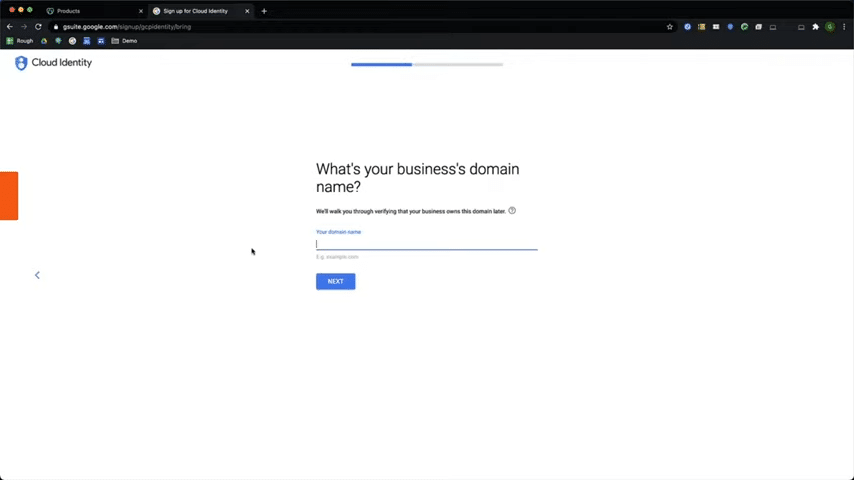
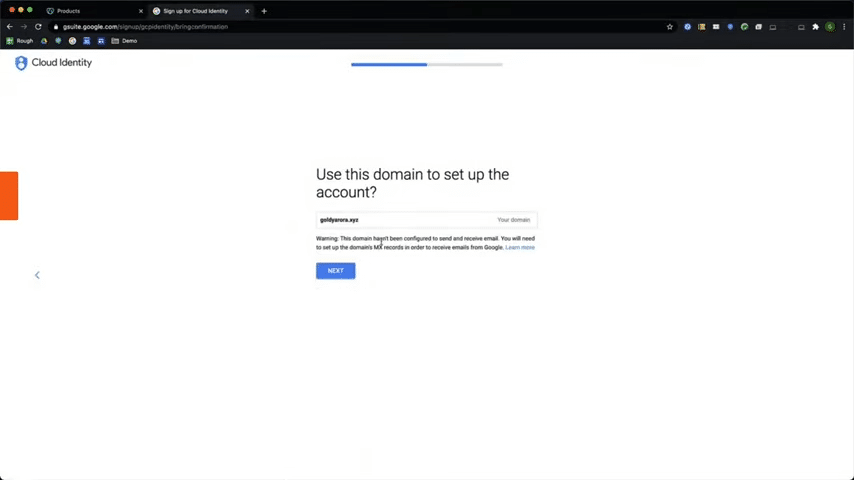
Here we need to provide our domain name,Google take domains as a standalone entity, even if I put subdomain here, for example, dev.goldyarora.com that will be considered as a primary standalone entity.
It shows me a quick warning that this domains MX (mail exchanger) records (which are responsible to email routing) are not yet configured, which is okaybecause I'm not using Google's Email or Google Workspace.
I will only be using Cloud Identity for Google Cloud platform subscription here, and already have my emails setup somewhere else (e.g with Microsoft Office 365)
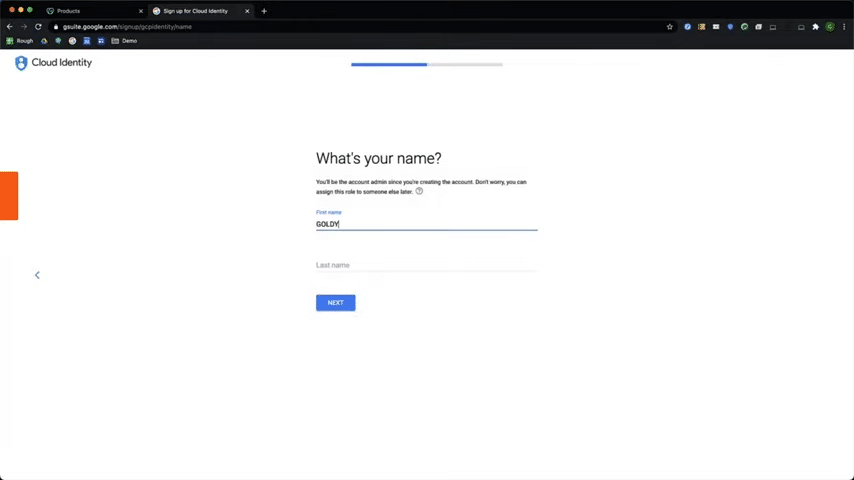
Now I will be creating the first admin account so I will give it a name, maybe Goldy Admin, and click on next.
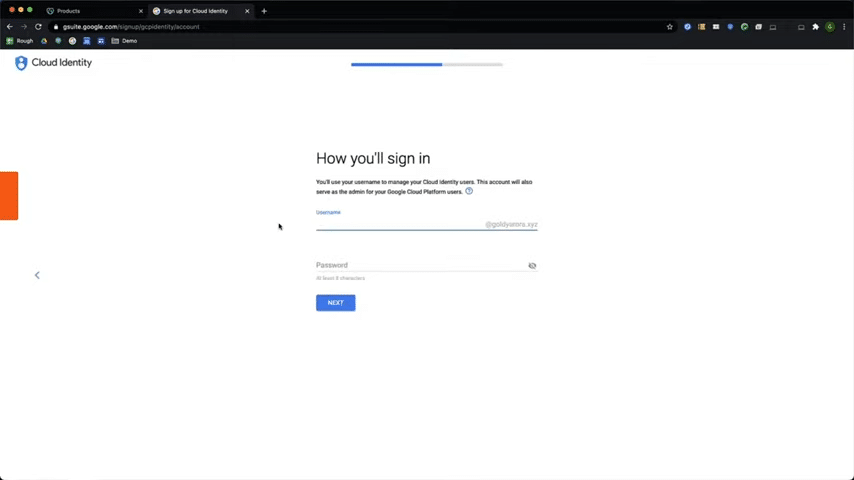
Now, I need to create the first Google Cloud Identity user in my domain, and this first user will become Super Admin for this domain, so I will choose the email and password, and then click on next.
There is an option to educate my users about Google Workspace, but for now I'll pass because I will be using Google Cloud platform only.

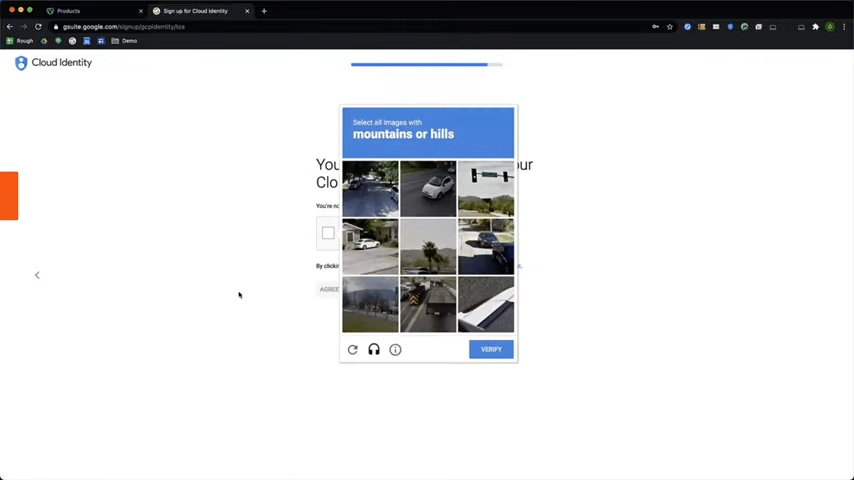
I will prove that I'm not robot, I'll go ahead and then provide consent that I understand and agree to Google Cloud Identity's terms of service.
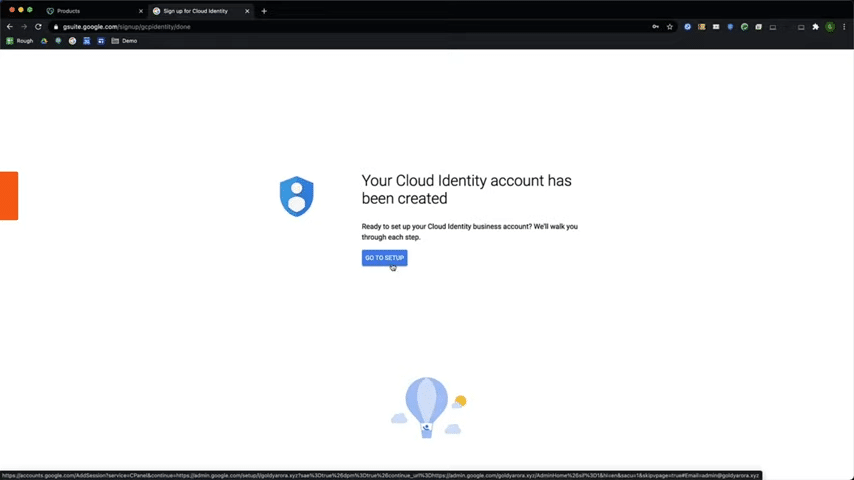
After a few seconds of processing, now it says that my Google Cloud Identity account has been set up, So I'll go ahead and click on go to set up.
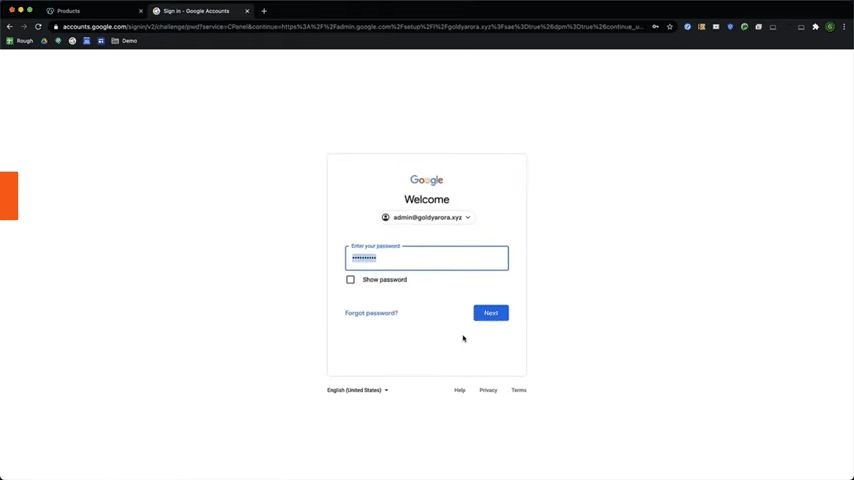
Now I will put my Super Admin user ID and password (which I created above) to login to Google Cloud Identity Admin Console.
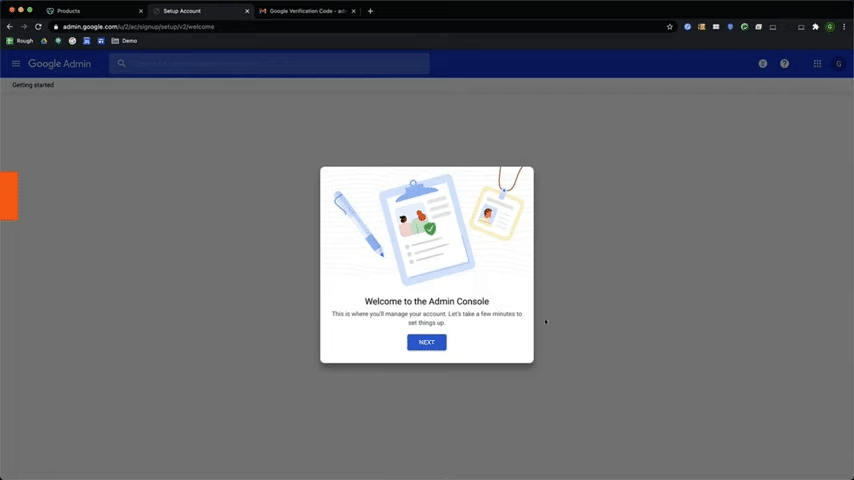
This is the first time I'm logging into my admin account, it is asking me to accept the terms of service.
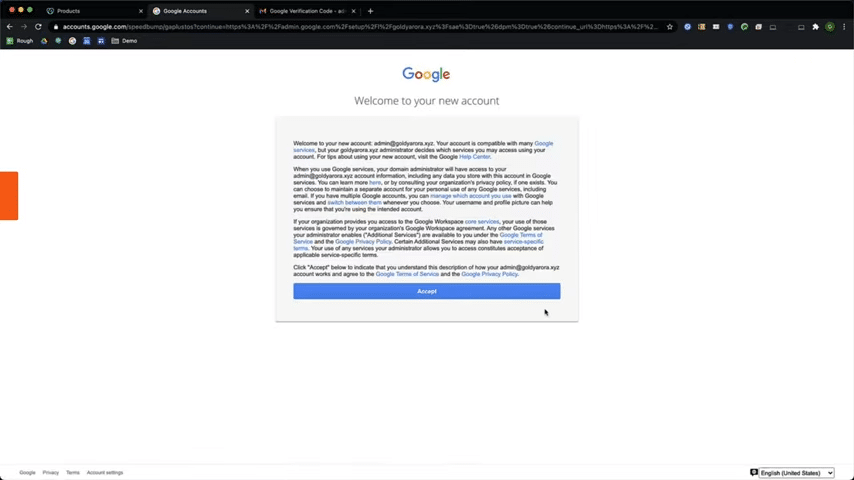
After accepting the terms of service, it says, welcome to Admin console.
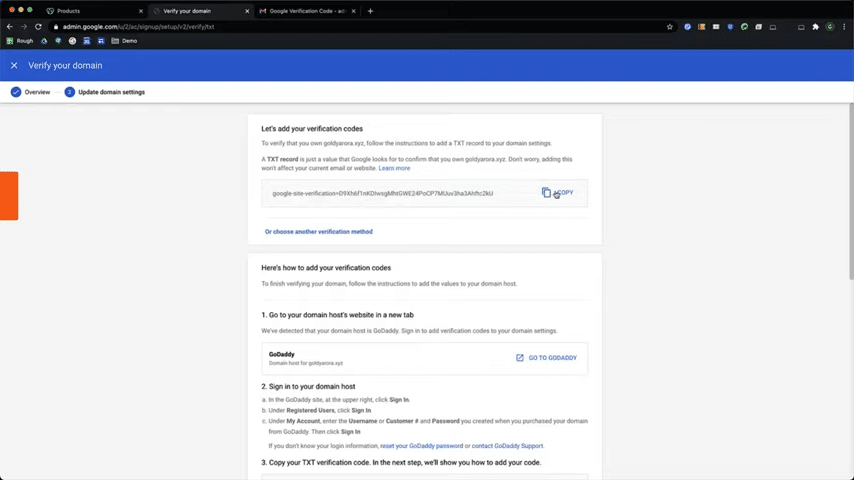
Now the first step that I need to do after registration of our domain with Cloud Identity is to prove Google that I own this domain.So I'll go ahead and click on Verify as you see in the screenshot below.

There are a few options to verify this domain name. I can either sign in to GoDaddy to verify it automatically, or I can click on switch verification method.

Here I can choose the method that I want to move ahead with, I'll go with create a TXT record.

When I click on next and continue,Google gives me this TXT string and recommends me to create a TXT record with the value of the string which I would copy.
And then sign in to my Godaddy DNS control panel (for you it might be Godaddy or any other domain registrar or web host based on where you have your name servers pointed).
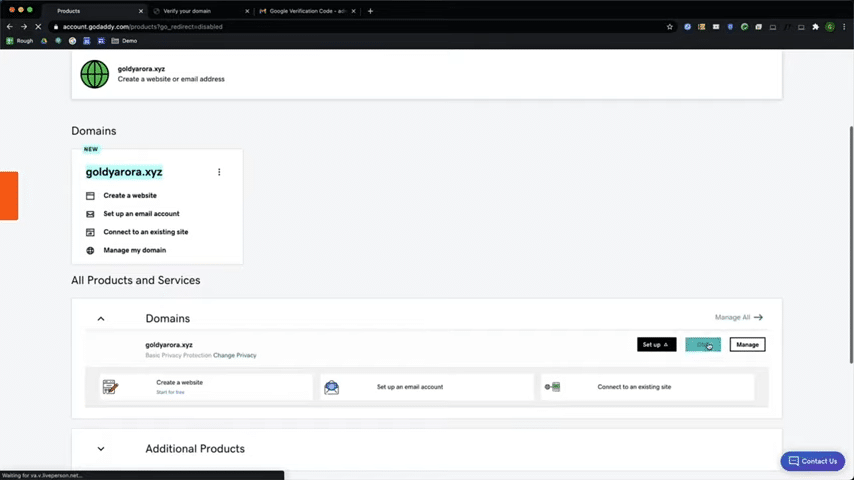
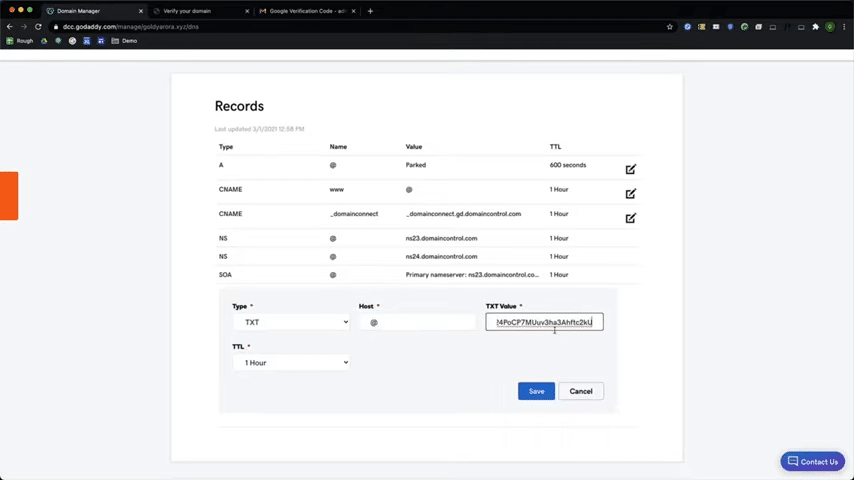
I'll click on DNS to make DNS changes.It will not impact my existing setup in any way. I'm just adding a TXT record for that I'll click on add record.Record type should be TXT, hostname should be just @ and the value would be the string that I copied from Google.I will go ahead and click on save, and now my TXT entry has been added.
I will come back to Google Cloud Identity admin console here and say, "Verify my domain now".
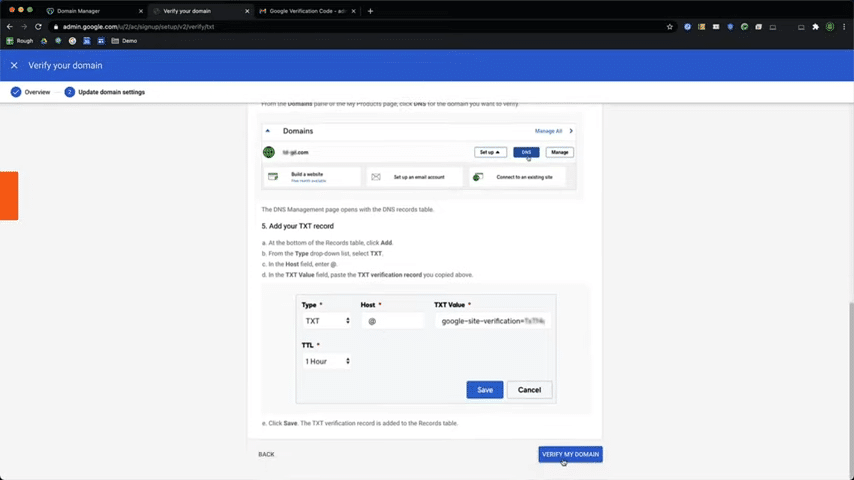
It may take some time to reflect these DNS changes.Okay, so after waiting for two to three minutes, my domain is now verified because Google was able to check that I have created the TXT record in my DNS for this domain.
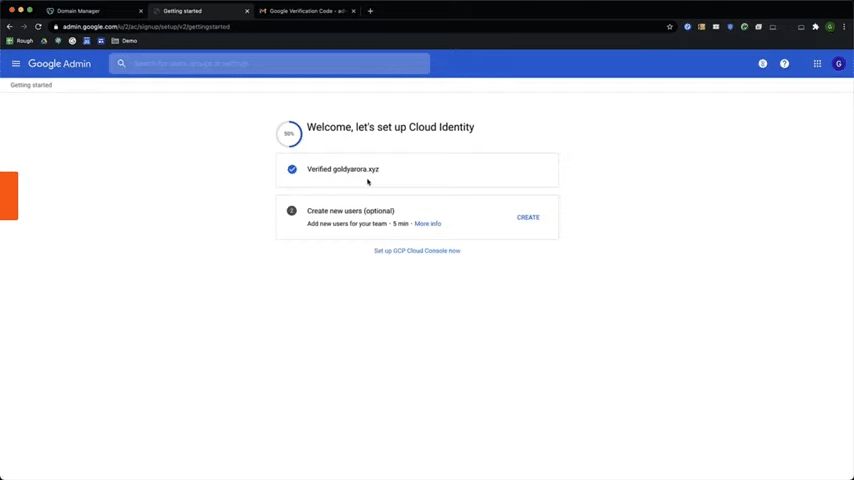
Okay, so with that, within a very few minutes, we were able to sign up for Google Cloud Identity with our own domain.
We verified our domain ownership to Google, and now we are all set to start taking next steps, which would be to create users, groups, members etc and then assign them required applications like Google Cloud platform.
Thank you so much.If you have any questions, comments please do not hesitate to put that under this, and I'll be happy to help.
Related Posts
....


