

Google Workspace MX Records Setup - Setup Google MX Records with Godaddy
- In the previous Google Workspace Setup video we created users and groups in our newly created Google Workspace account
- In this video we'll activate the email services so that all of the newly created users can start getting their emails in their Google Workspace mailboxes.
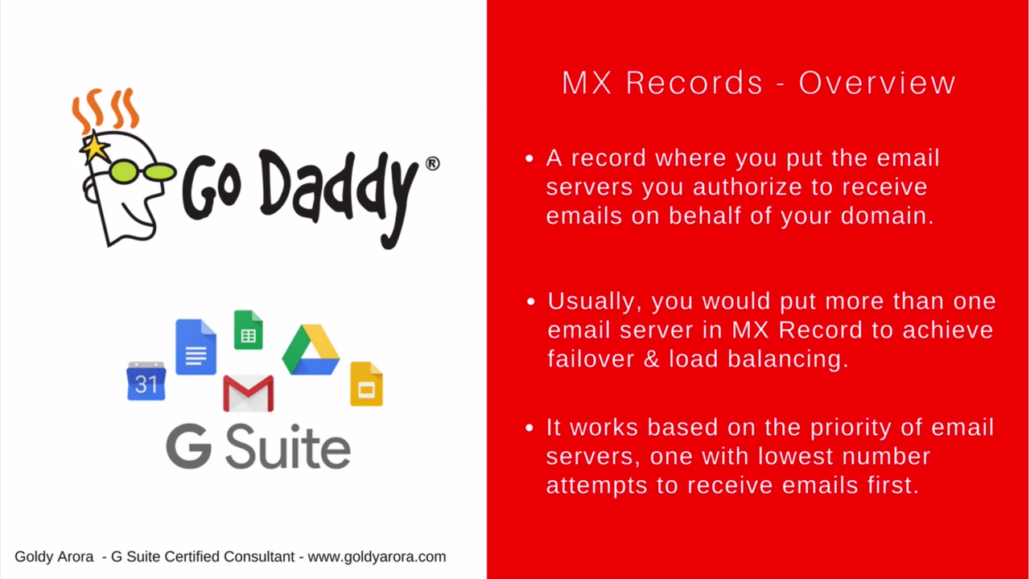
MX Records Overview
- Now before we dive into our guide, just a heads-up so you understand what you're going to do.
- When we create MX records we also define priority of mail servers to tell the DNS which email server should receive our email first.
- Usually you'd have more than one mail server address in your MX records to do some sort of load-balancing so if one mail server is down, the second one would be ready to pick up your email so they don't bounce back.
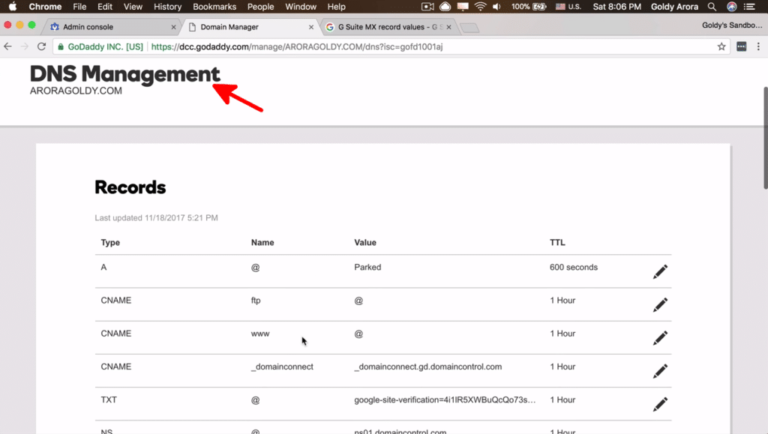
1. Access GoDaddy DNS Management
- So our first step is to log into GoDaddy and get access to DNS Management.
- To access DNS Management, login to GoDaddy then click on "My Products".
- Then go to Domain Names, under domain names click on DNS and you should land on a similar screen.
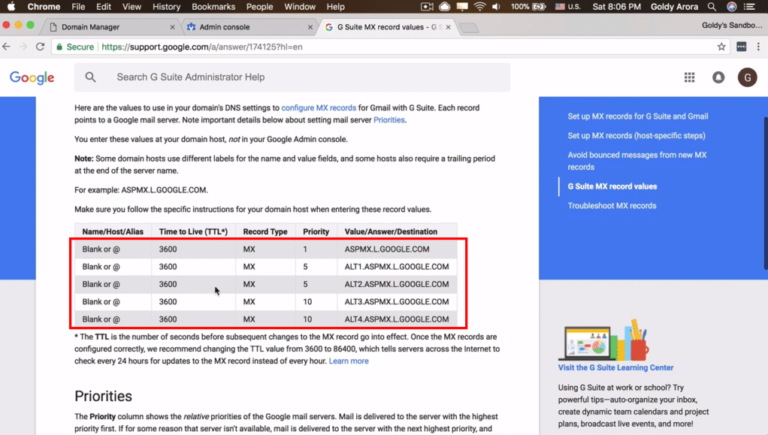
2. Search for "Google Workspace MX Records"
- You want to find Google Workspace MX Records, so in this step you'll head over to Google search and type in "Google Workspace MX Records".
- Usually the first (non-ad) result is what you need to click on.
- Now what you have is a list of 5 MX Records values. We'll need these in our next steps.
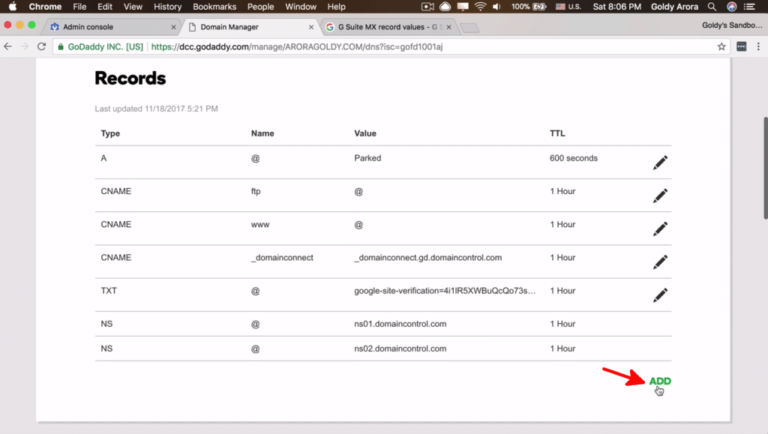
3. Click "ADD" in GoDaddy DNS Management.
- In this step you'll want to add a new MX Record to your domain in GoDaddy DNS Management page.
- So go to GoDaddy DNS Management (in step 1), scroll down the page and click on "ADD" to start adding a new record.
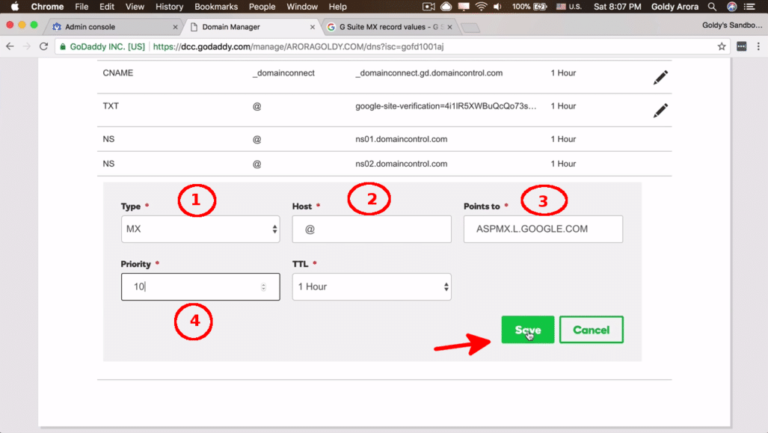
4. Add a Record to GoDaddy DNS
- In the first field you choose "MX" as type, then type "@" symbol in the second field.
- Now you copy the value of Google Workspace email server (in step 2) and paste it in the third field.
- In the fourth field, you don't necessarily have to copy values from Google Workspace MX Records table. You just have to maintain the sequence of 10, 20, 30 for instance.
- Then click Save to add a new record.
5. Add rest of the Records
- So now you will repeat step 3 and 4 above to add the rest of MX record values from Google Workspace table.
- Maintain a sequence of priority i.e 20, 30, 40, 50 for the subsequent values.
- After adding all the 5 records, you'll end up with a similar list like one in the screenshot.

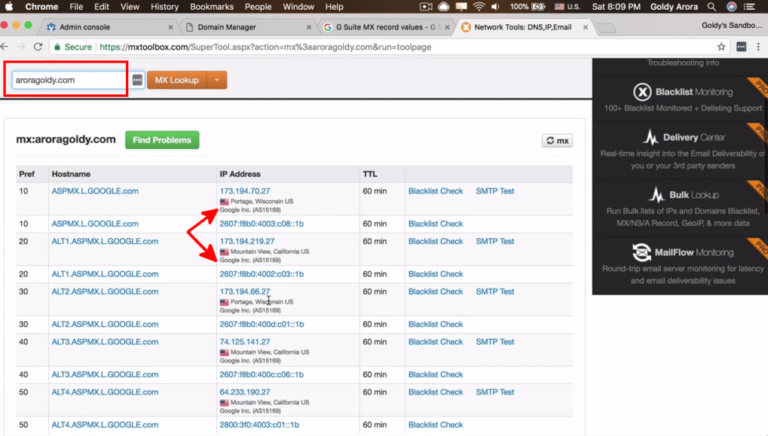
Check DNS Records
- Having added MX Records to point to Google Workspace servers. You may want to confirm that the exercise was a success by perfoming an MX Lookup.
- So for that just go to Google search and search for "mxtoolbox". This tool will help do the check.
- As you can see, when I type "aroragoldy.com" IP address points to Google servers. You should have the same results when you type your domain.
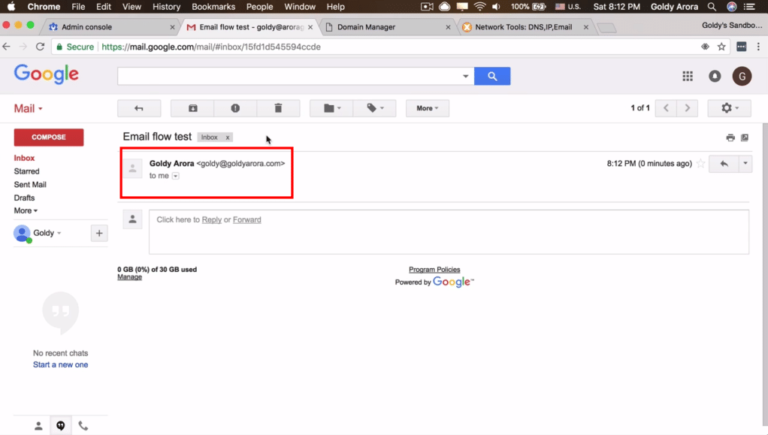
Send a test Email
- So you can now try and send a user in your Google Workspace account an email to see if everything is set correctly.
- In my case if I send an email to goldy@aroragoldy.com (an email I created in the first steps of this series), this user is able to receive emails.
- In the next guide we'll be configuring SPF Records which prevents emails from going to recipients' spam box.
- As always, if you have any questions, feel free to leave them in the comment section and I'll be happy to help. Thank you so much!
Related Posts
....


