

Google Workspace Godaddy Setup: Creating Users & Groups in Google Workspace
- Hi and welcome to video 4 of our step by step guide to Google Workspace Setup.
- In our previous video we verified our Godaddy ownership to Google Workspace and we're all set to move on.
- In this video let's create users & groups in Google Workspace.
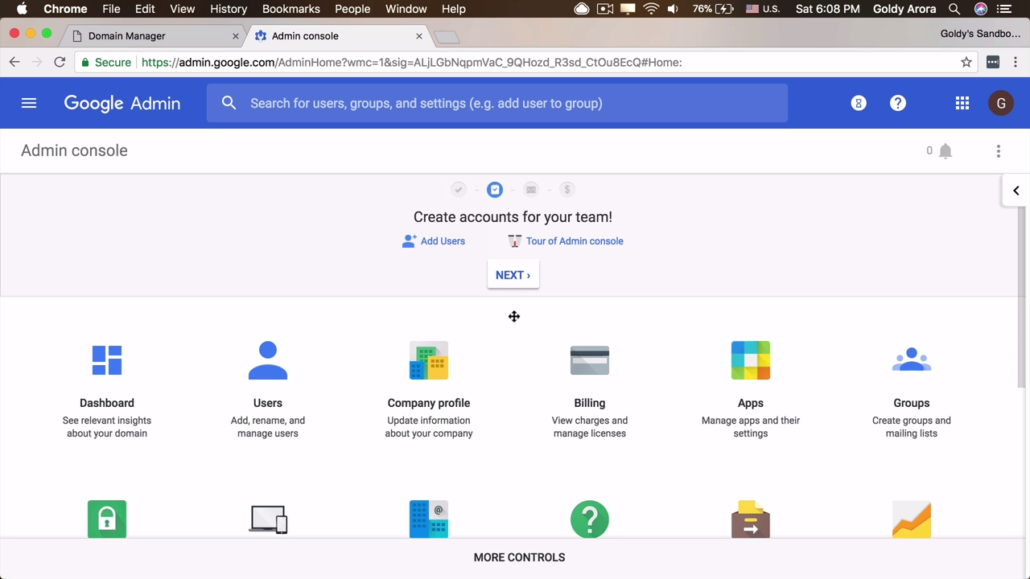
1. Login to Admin console
- If you haven't already logged into your Google Workspace admin console, go ahead and login by going to "admin.google.com" using the ID and password you created at the beginning of this guide..
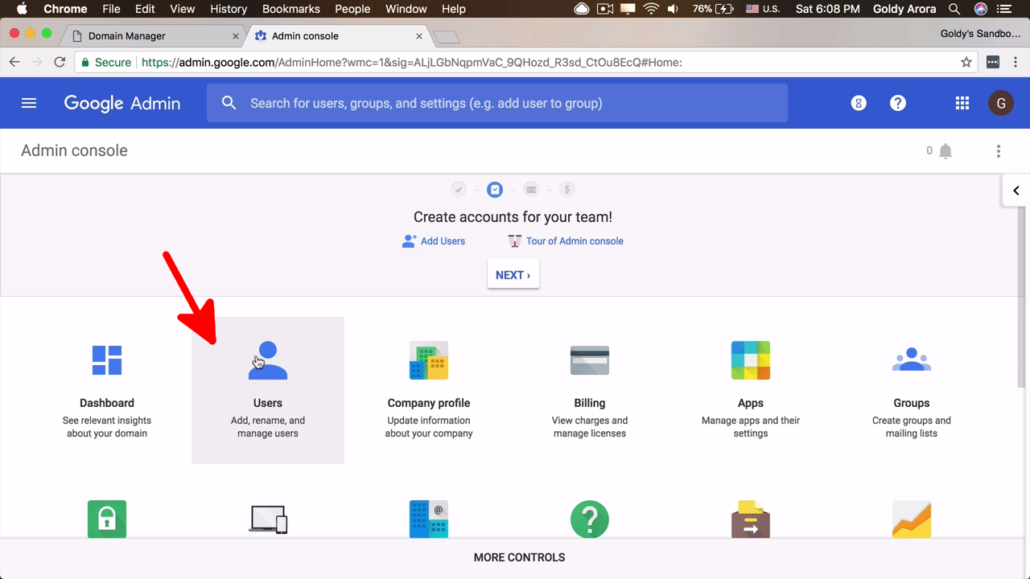
2. Click on "Users"
- From your admin console you should be able to click on "Users" to start creating new users..
- You can also do the same by searching for "users" from the search bar at the top.
- Or you can as well click on the hamburger icon on the left-top corner of the page to get to the same destination.
3. Create a User
- You now have two ways of creating new users. One is by creating a single user at a time or you can create multiple users at once.
- I will show you how you create new users in both cases from the options provided.
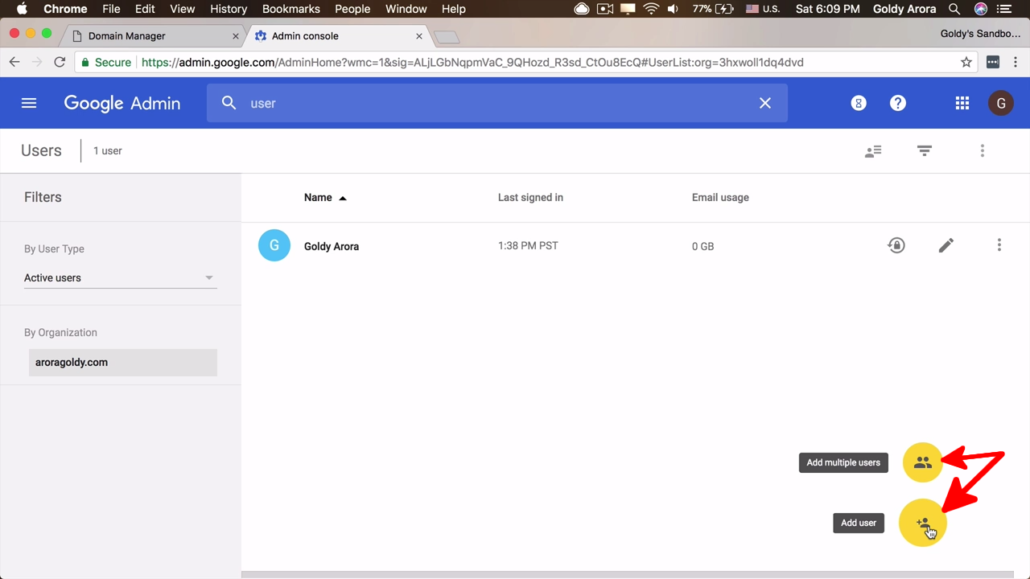
a) Creating a User at a time
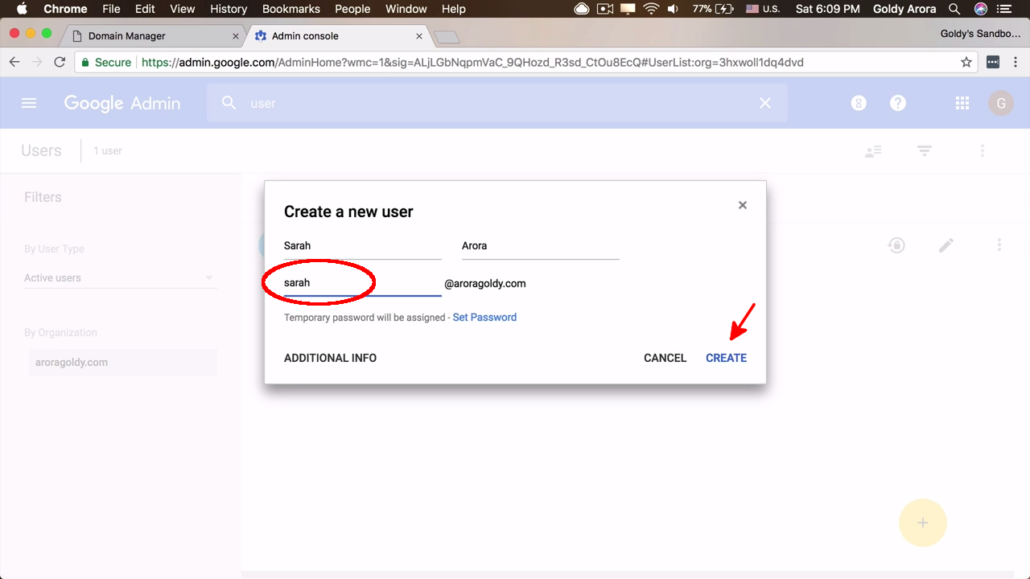
- To create users one-by-one, click on the "Add User" button from previous screen.
- You then get a form where you can fill in a username for a new user. For instance, I will type "sarah" as a username.
- Then you can set the password for the user or you can click on "Create" and let Google generate a random password which you can then send to the user.
b) Creating Multiple Users
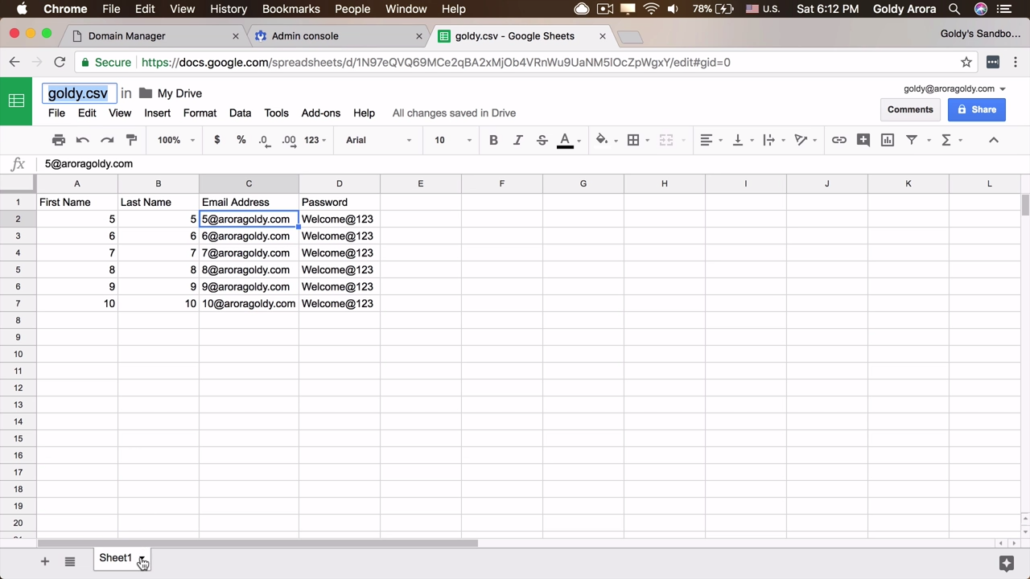
- Another way of creating users in Google Workspaces is by preparing a sheet which you then upload to let Google create users from it.
- This spread sheet should have a bear minimum of at least columns which are "First Name", "Last Name" and "Password" because these are required fields.
- Make sure you save this spread sheet in "CSV" format when you're done editing.
Upload Spread Sheet
- The next step is to upload a spread sheet of users you just created and let Google start creating these users for you.
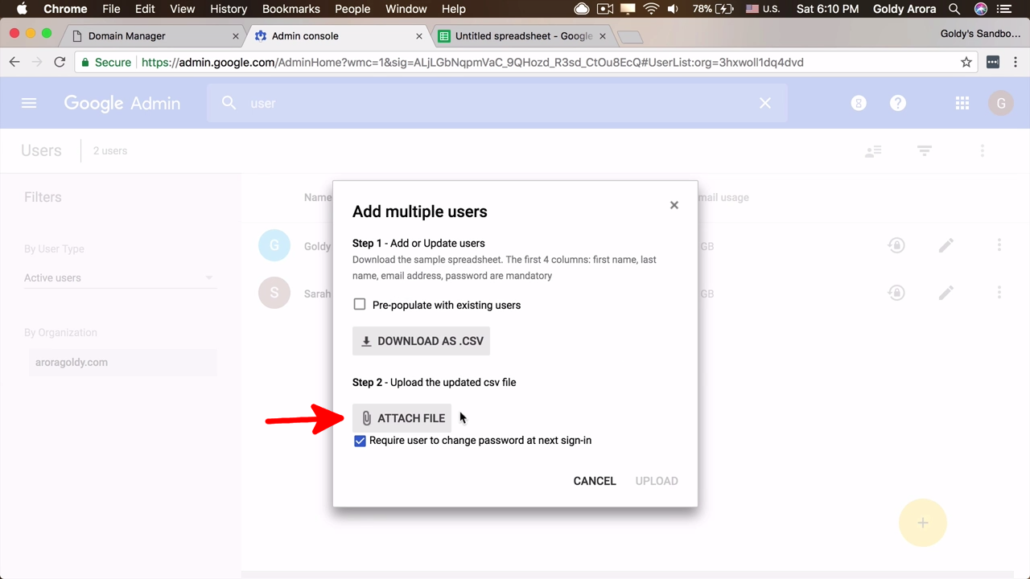
- So you go back to step 3 above and this time click on "Add Multiple Users" options.
- You now have an option to upload the CSV of users you just prepared.
- Make sure you check "Require user to change password on next sign-in", then click on "Upload.
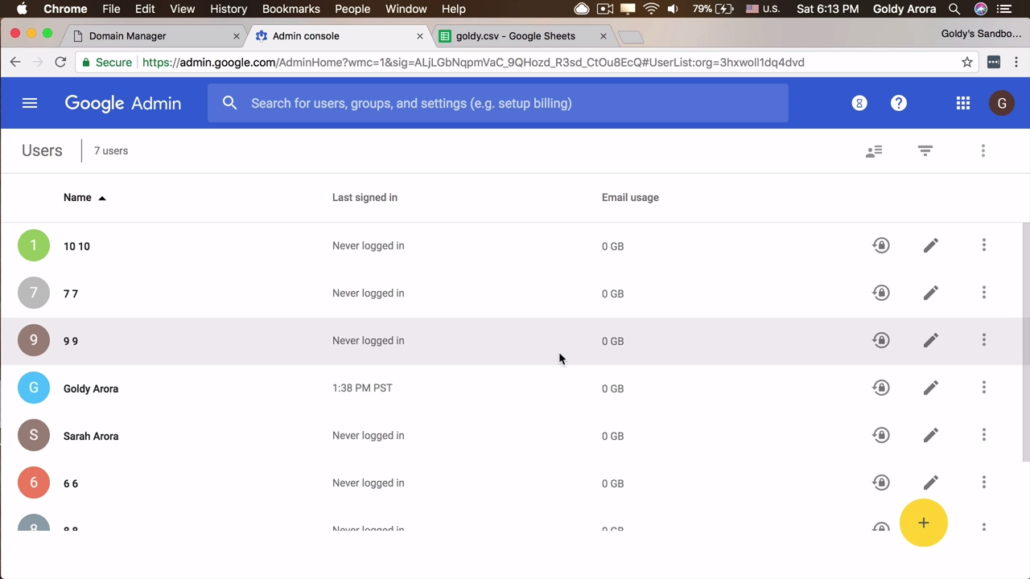
Multiple Users created
- After some time depending on the number of users you have on your CSV file, Google will send you a notification letting you know that users have been created.
- You should then be able to refresh and be able to see your list of users that Google automatically created for you.
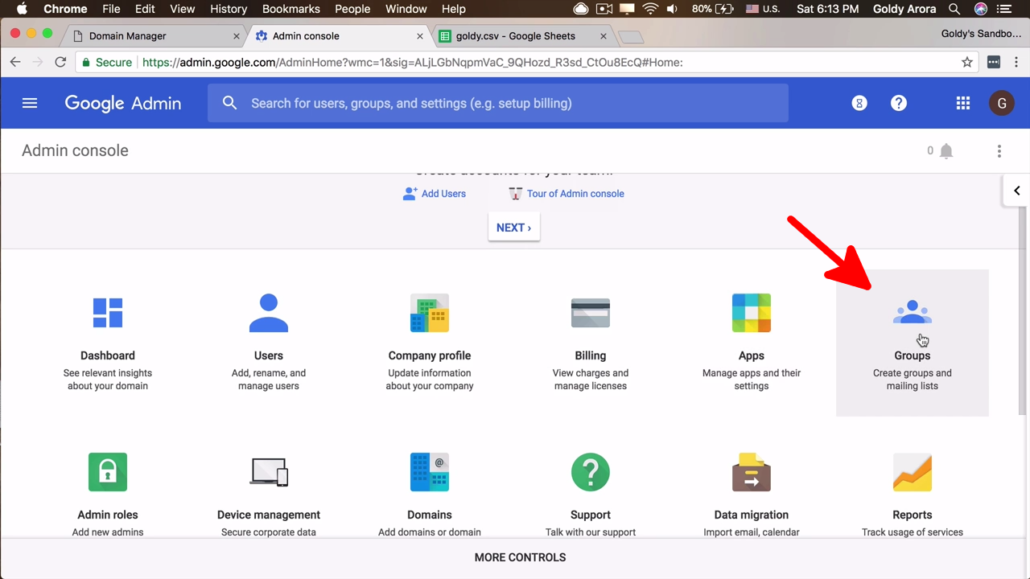
4. Creating Groups
- If you have multiple people that will be receiving an email from a single email address such as sales@yourdomain.com. You should be creating groups other than spending money on buying licenses.
- For instance, I have a team of sales but when an email is sent to sales@aroragoldy.com, each member in the team should receive an email.
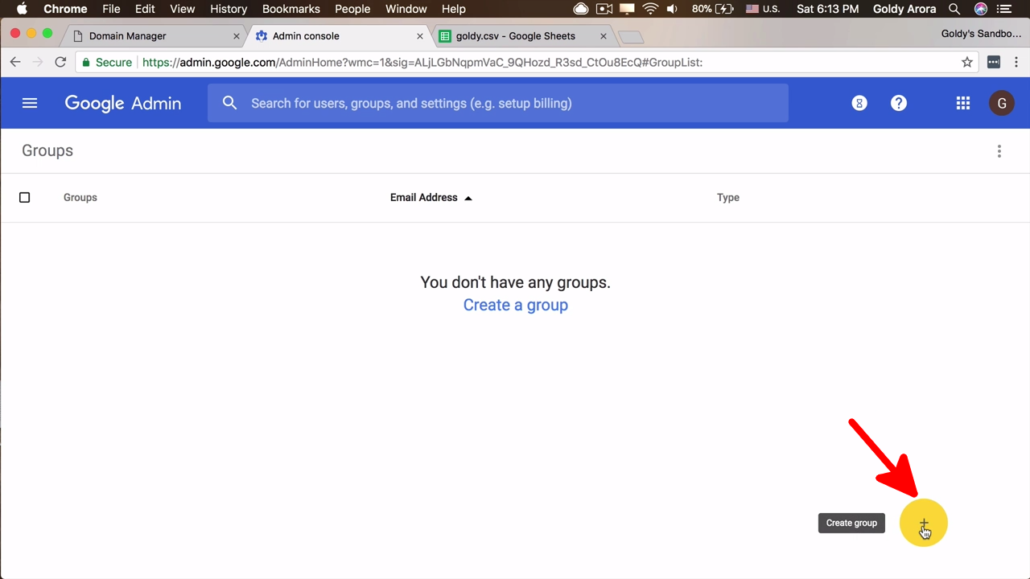
- So to do that, go to your admin console and click on "Groups".
a) Click "Create group"
- So to get started with creating groups in your Google Workspace account you'll have to click on "Create group" icon at the bottom of the page,
- If you have already created some groups they get to show up on this page.
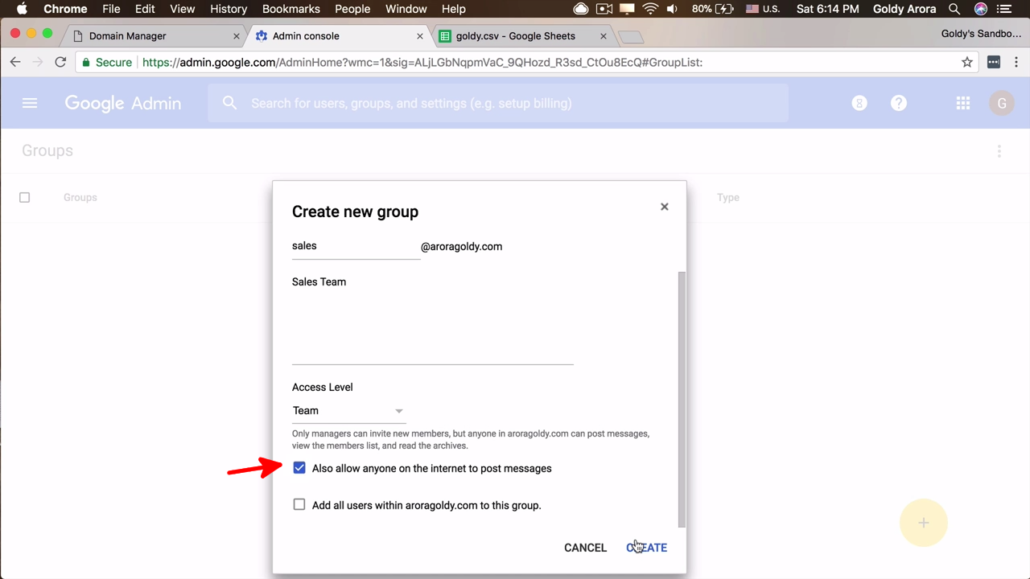
b) Provide group details
- Next, you complete the form to create a new team.
- Provide your teams name, "Sales" in my case, then an email username which is "sales"@aroragoldy.com. You can also provide a description.
- Then choose "Team" under Access Level option and then make sure you check "Also allow anyone on the internet to post messages"
- Click "Create" to continue
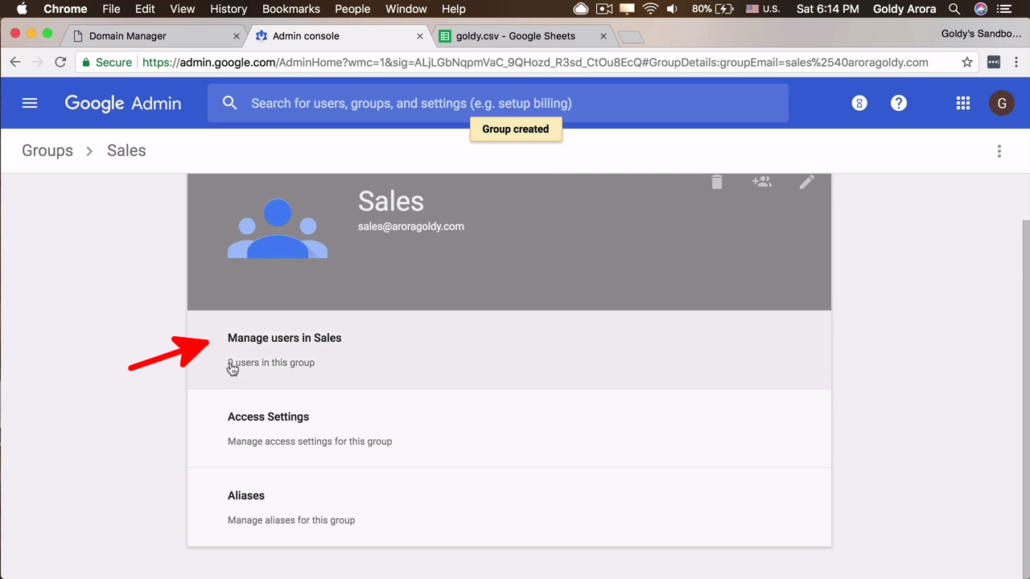
c) Click "Manage users"
- After creating a group, you now get can now go ahead and manage this group.
- To do so, click on "Manage users in [your group name]".
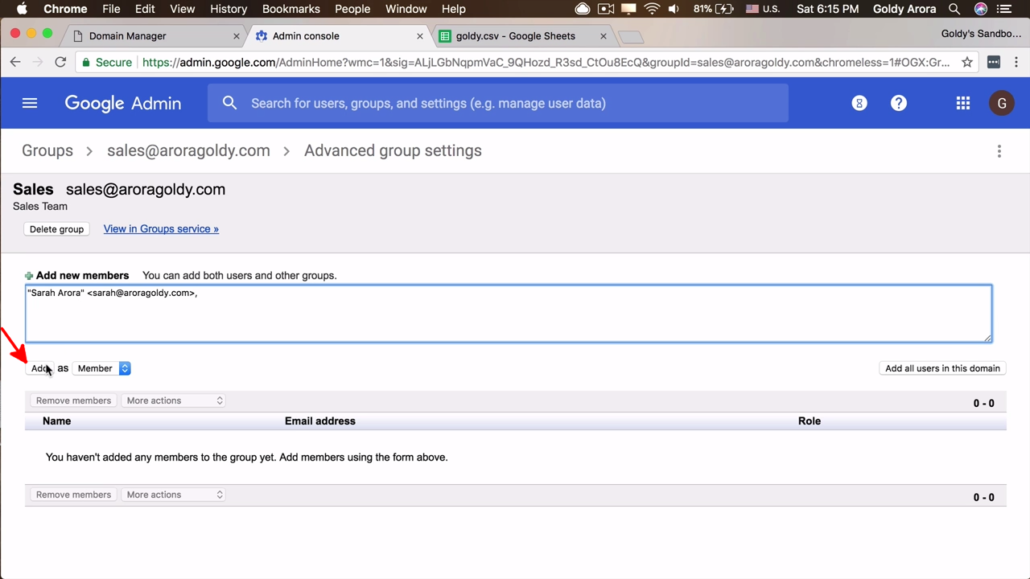
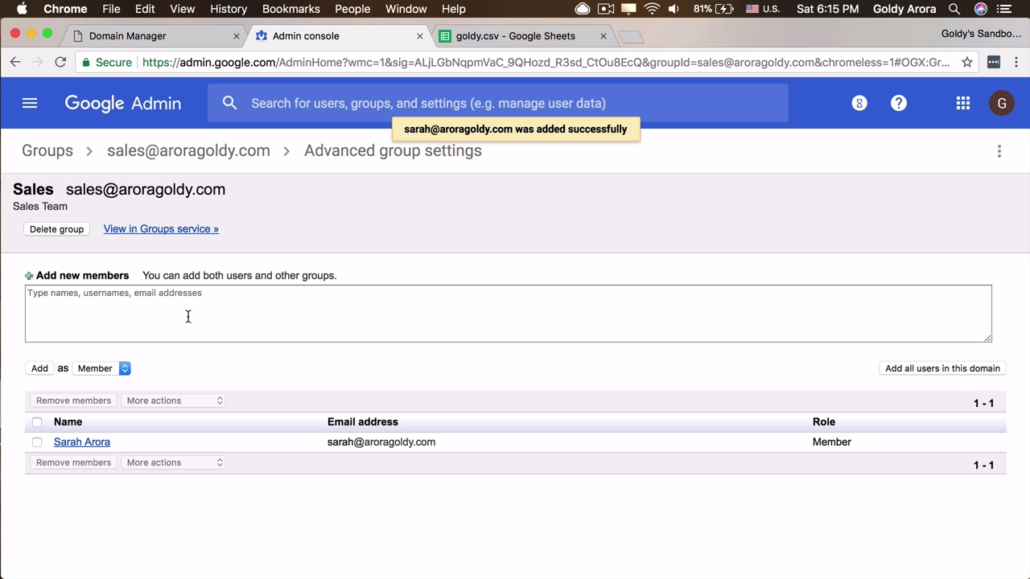
d) Add new members
- Now it's time to add some members to the group you just created.
- And any email sent to "sales@aroragoldy.com" will be forwarded to the people you add to this group.
- So type a member's name, username and email and click on "Add".
New member added to group
- Now that we've created users, a group and added members to a group.
- In our next guide we will go ahead and point our email services to Google mail servers. Which means all these users will begin receiving emails in their gmail inboxes.
- So make sure you checkout the next guide. Thanks and if you have any questions leave them in the comments section below. Thank you!
Related Posts
....


