

Personalize Your Access URLS for Google Workspace Services
- You would not prefer for people to type mail.google.com when accessing emails under Google Workspace services.
- What if you could personalize such URLs to a professional URL like mail.yourdomain.com?
- So in this Google Workspace Setup guide, I will be showing you how to do this for different services such as drive, calendar etc.
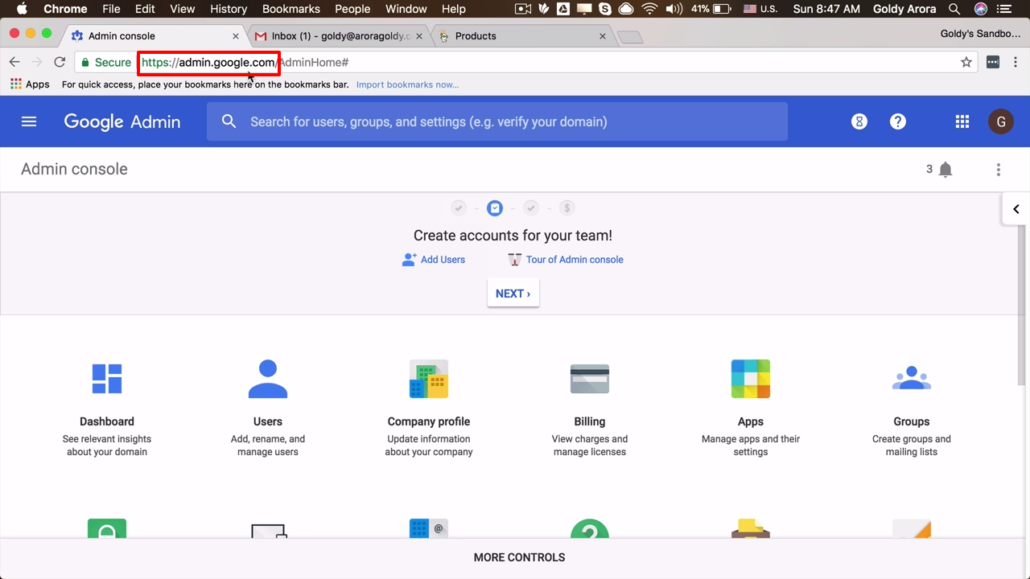
1. Login to Google Workspace console
- First, login to Google Workspace admin console if you have not.
- To login, click this link or visit https://admin.google.com and enter your admin username and password.
- Here's a complete guide on how to login to Google Workspace just in case you're having trouble logging in.
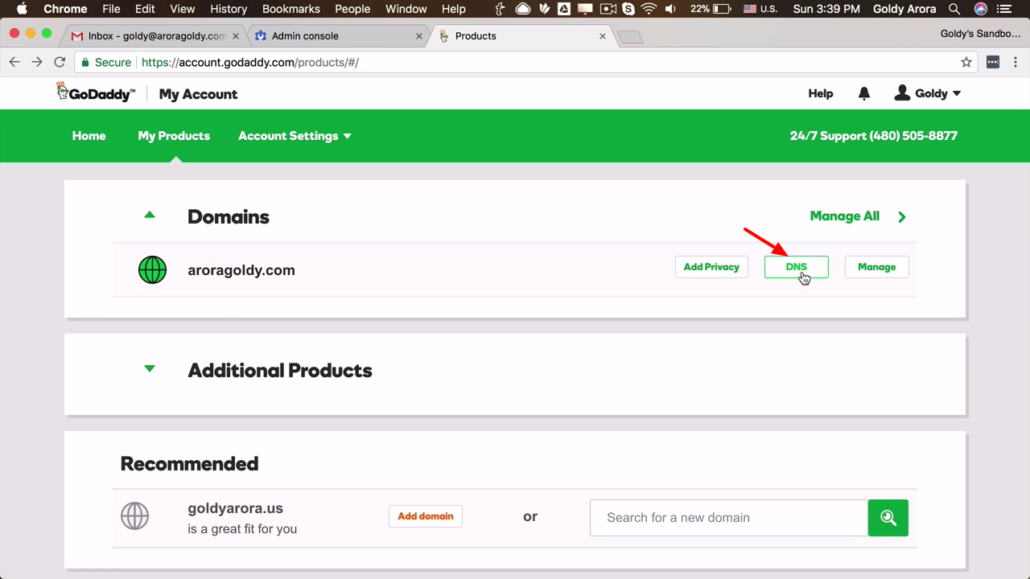
2. Login to your domain registrar.
- Login into your domain registrar. Then access the DNS page.
- If your domain is on Godaddy, login then go to products page. On products page go to Domains sections then click on "DNS".
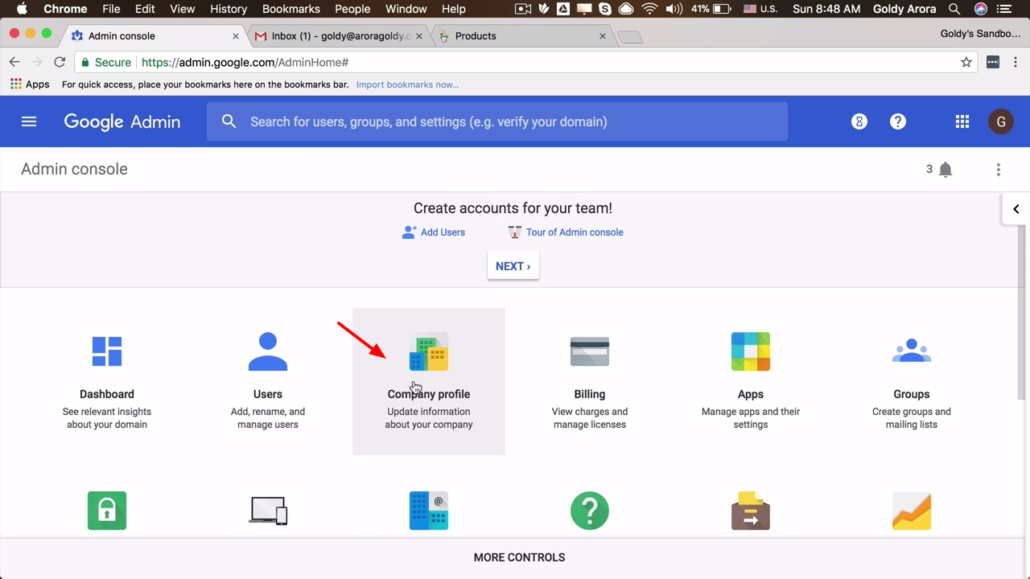
3. Click on 'Company Profile' in Google Workspace.
- From Google Workspace admin console, click on 'Company profile' item. Continue to next step.
4. Click on 'Custom URLs'
- On the profile page, scroll down and click on 'Custom URLs'.

5. Create custom URL
- Under 'Custom URLs', you can now setup your preferred personalized URLs.
- Check 'custom' radio button then type your desired subdomain for different Google Workspace services.
- Once you're done with adding in your personalized subdomains, click 'Save' and then continue.

4. Changing CNAME record
- So the next exercise is to create new CNAME records for all new subdomains you just created.
- CNAME destination will point to 'ghs.googlehosted.com'. So copy this to your clipboard and move to next step.

5. Create CNAME record
- To create a CNAME record, go back to your domain's DNS page and click on "ADD".
- In field (1) choose CNAME as type of record.
- Type a subdomain in field (2) such as 'mail' that you created in step 5 as host.
- Then paste into field (3) the CNAME destination you copied in step 4 above.
- Click "Save" and repeat these steps for all of subdomains such as drive, calendar, etc.

6. Complete CNAME setup
- Now go back to Google Workspace admin console and click 'I've completed these setups' to let Google know that you're done with adding CNAME.
- Depending on where you have your DNS, it may take time to reflect but in most cases it's instant.

You're all set!
- Now when you instead of typing mail.google.com for instance, your users can just type mail.yourdomain.com in their browsers.
- If you see an error while adding a custom URL, it's likely that you're entering a duplicate URL or the URL is already in use. Double check and try again.
- For questions and comments, feel free to leave them in the comment section below and I'll be happy to help.
Related Posts
....


