

Bulk Create Google Workspace Users with Ok Goldy
How to bulk create or add Google Workspace users
In this tutorial you will learn how to bulk create Google Workspace users using the OK Goldy Google Workspace add-on.
As a Google Workspace admin, you are often asked to add lots of users to your organization’s Google Workspace account so that they can use the official email ID and use all the apps and functions provided by Google Workspace.
Although Google Workspace has a very straightforward interface for creating new users, it doesn’t have a way of adding them in bulk.
Suppose you need to create 20 users, or 200 users.
Perform Google Workspace functions in bulkThe OK Goldy Google Workspace add-on has been created to help you perform many Google Workspace admin functions in bulk using Google Sheets.
In this tutorial you will learn how to bulk create or bulk add Google Workspace users with the OK Goldy Google Workspace add-on for Google Sheets.
In the “How to install the OK Goldy Google Workspace add-on” you have already learned that once the add-on is installed and setup, it creates a set of worksheets in your Google Sheets document.
These worksheets will help you perform various Google Workspace-administration-related functions in bulk. Now, let’s learn how to create Google Workspace users in bulk.
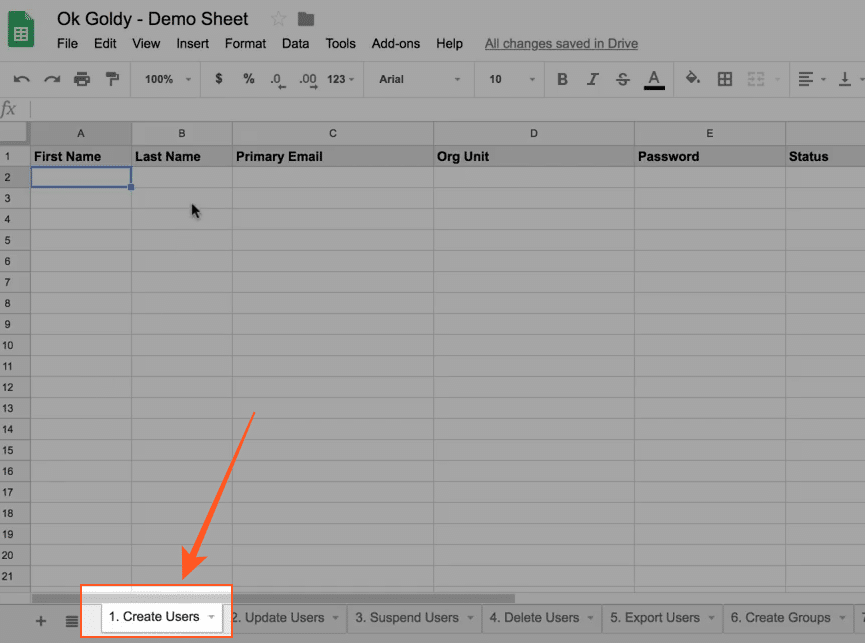
1 Open the Google Sheets document that you used when you set up your OK Goldy add-on (which contains all the worksheets).
In the Sheet, if the “Create Users” worksheet tab isn’t already selected, click it and select it.
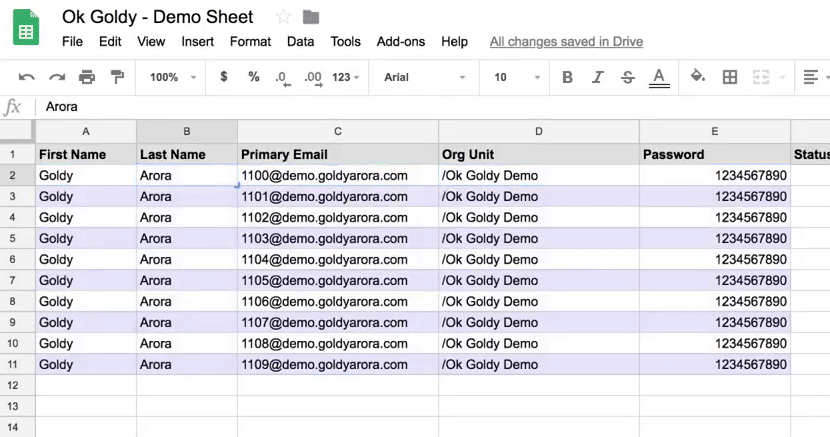
2 You can see in the above screenshot that there are six columns in the worksheet, namely
- First Name – you enter the first name here.
- Last Name – you enter the last name here.
- Primary Email – the email that needs to be created within your organization’s domain name.

- Org Unit – if you have created different organizational units (for different access levels to your users) you can enter the names of the organizational units here. You can have different names for different rows.
- Password – the password that will be used by the user you have created to access his or her email and other components of his or her Google Workspace account.
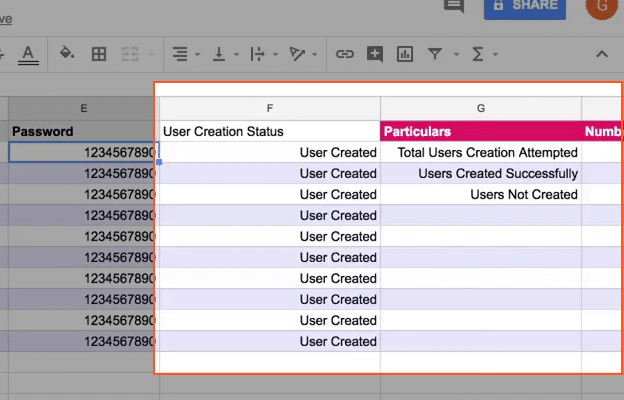
- Status – this information will be filled by the OK Goldy add-on itself
3 Fill in all the details in the appropriate columns.
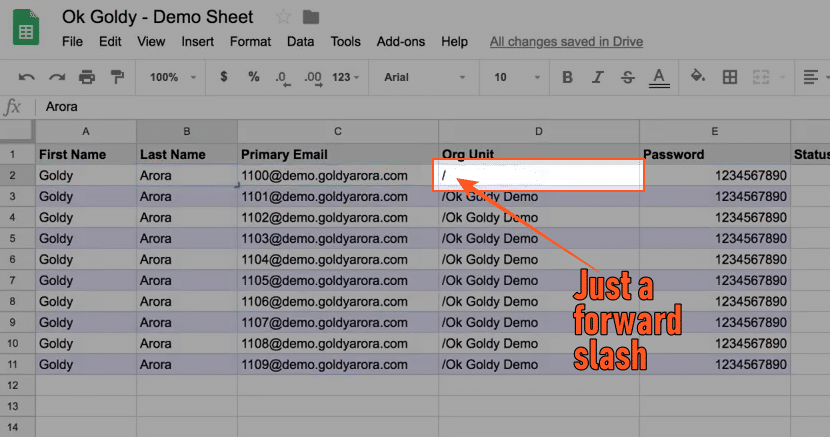
You will notice that you have to add a forward slash before the name of the organizational unit. This is just for hierarchical purposes. If you want to add a particular user in the “parent” organizational unit, you simply put a “/” in the column, like this
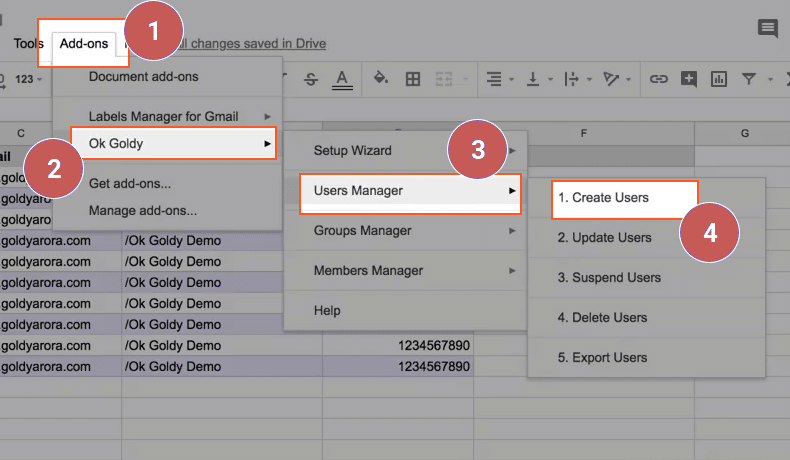
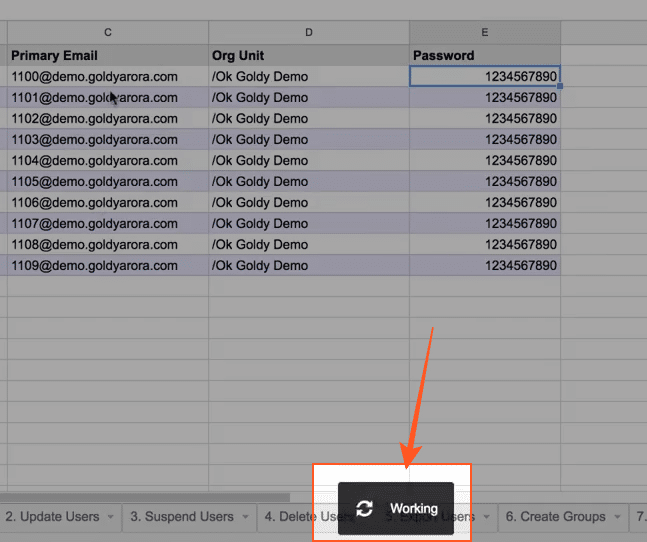
4 Run the add-on module for creating new Google Workspace users in bulk, using the following command path:
Add-ons >> OK Goldy >> User Manager >> 1. Create Users
You will see the “Working” graphic that shows that the Google Workspace users are being created in bulk.
Remember the “Status” column that we left blank and I told you that the values will be filled by the add-on itself? Once your “Create Users” module has run the status column will be filled. It will tell you that all the users have been created successfully.
You can go to your Google Workspace admin dashboard to verify that all your users have been created in bulk. Make sure you go to the appropriate organizational unit to see the status of the new users you have just created in bulk.
Related Posts
....


