

Ok Goldy - Add on Installation
Installing OK Goldy – The Google Sheets Add-On for Managing Your Google Workspace Users
This tutorial will take you through the steps of installing and setting up the OK Goldy Google Workspace add-on. This add-on is for Google sheets.
As a Google Workspace admin, managing multiple users can turn into an ordeal especially when you have scores of users.
Typically, as a Google Workspace admin you may have to perform the following functions to manage your users:
- Add new users
- Modify existing users
- Export all your Google Workspace users in Sheets
- Suspend or un-suspend users
- Delete existing users
Let’s say you have to change the status of 50 users.
Although the Google Workspace dashboard is easy to use, shuffling between different screens, one user at a time, can be quite time consuming and tedious.
OK Goldy makes it very easy.
All you have to do is, make the changes to the Sheet that is created and used by the add-on, run the associated function of the add-on, and your job is done. Whether you have 5 users or 500 users, just change the respective columns and OK Goldy takes care of the rest.
Here is how you install OK Goldy…
1 Log into your Google Workspace account.
2 Go to Google Sheets
3 Create a blank sheet and give it an appropriate name.
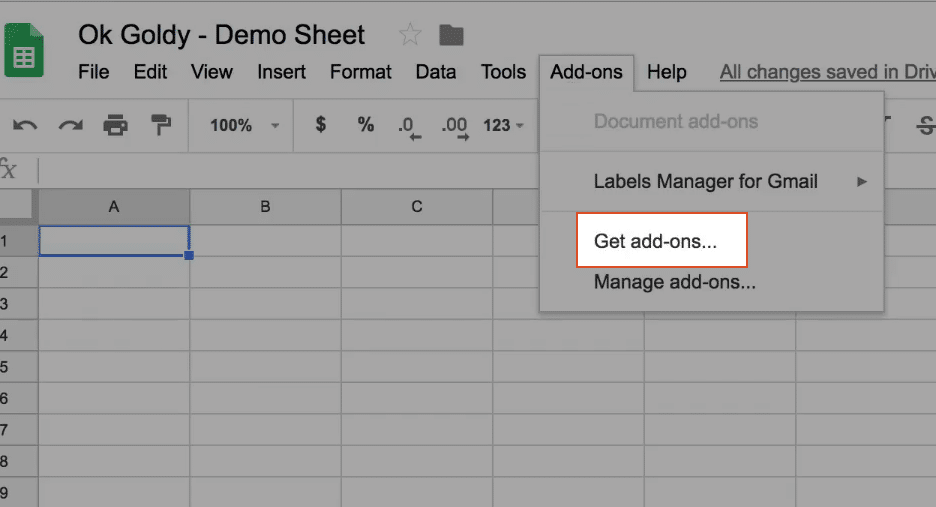
4 In the top menu, click on “Add-ons” and from there, “Get add-ons…”
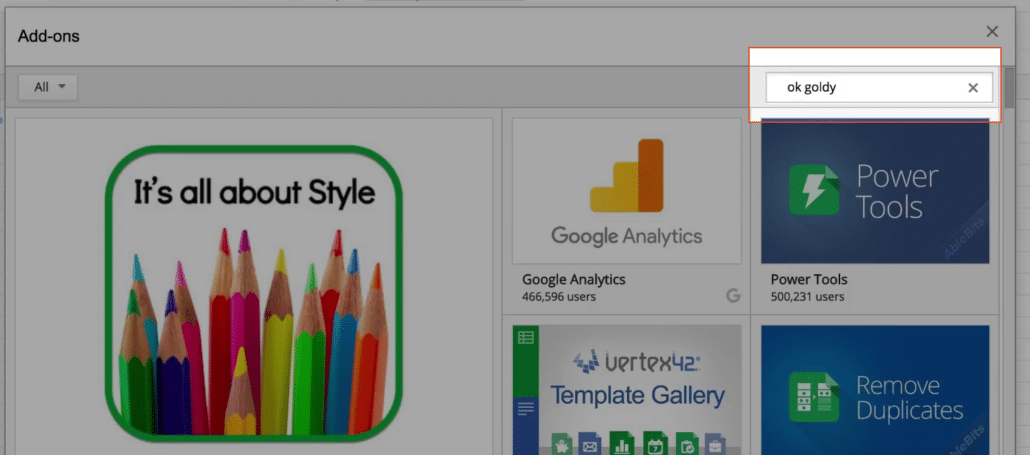
5 In the Add-on screen, type “OK Goldy” in the search box.
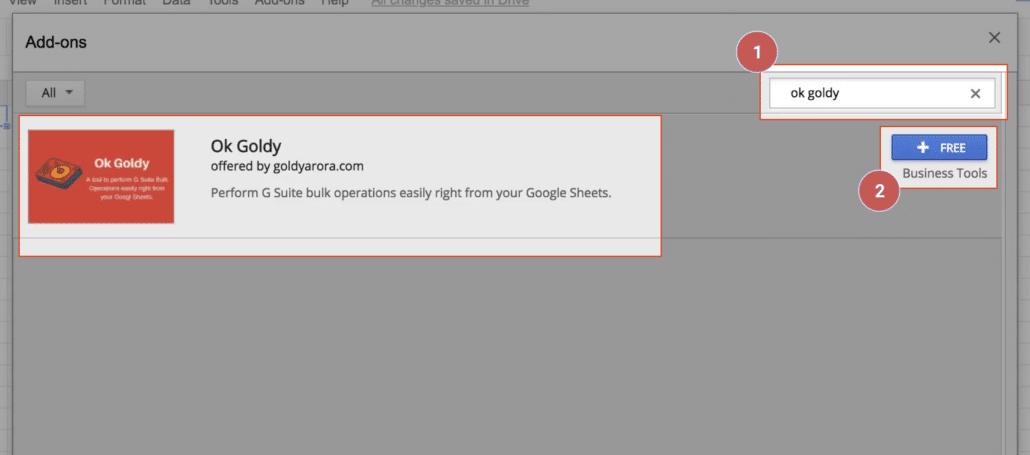
6 The OK Goldy is immediately brought up by the add-on store. To install it, you need to click the blue button. As you can see, the OK Goldy add-on is a free add-on.
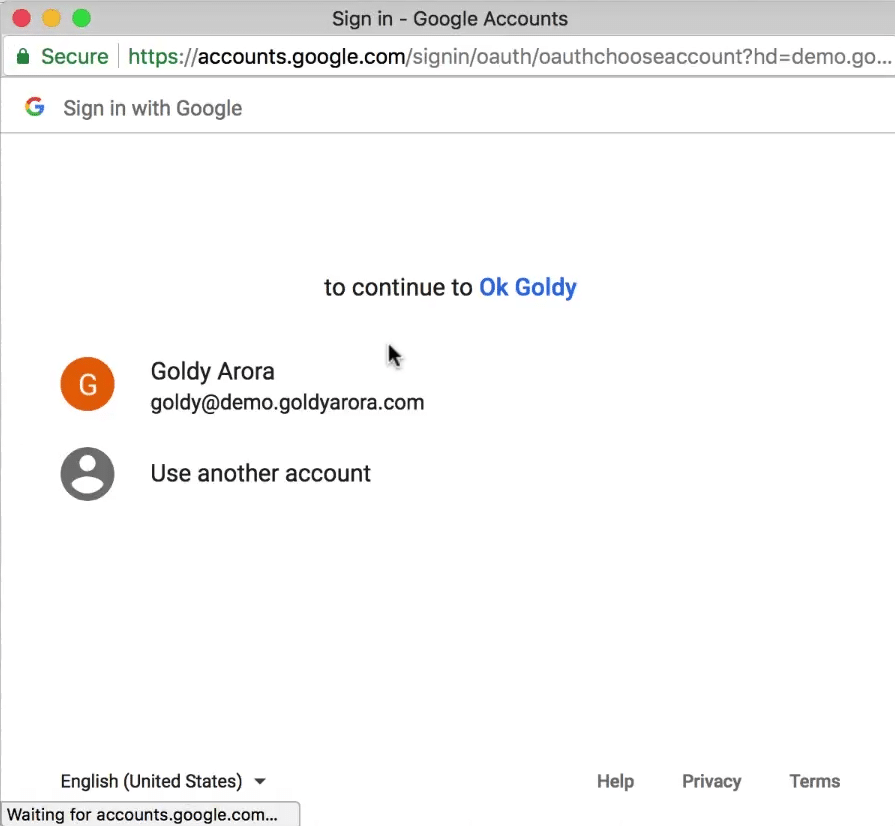
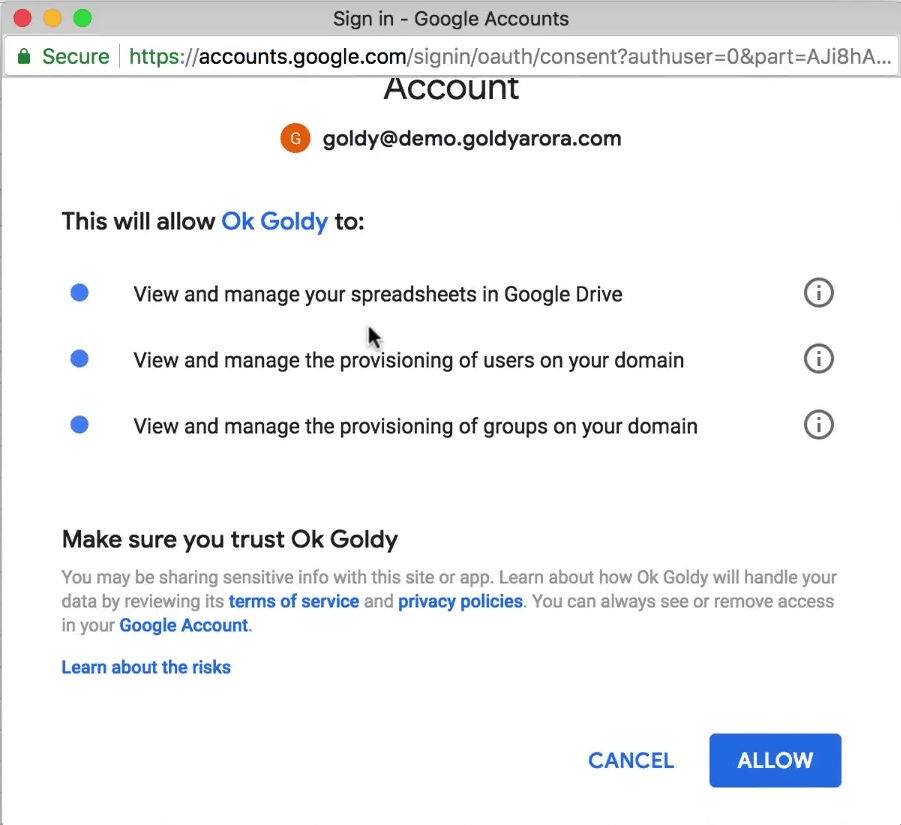
7 It asks you which Google account you would like to use to install the add-on. Make sure you select the account that you use as Google Workspace administrator.
8 The next screen is the usual screen that you get when you install an add-on – it tells you what all the add-on will be able to do through your account. It basically makes sure that you know that you are providing a certain level of access to the add-on to be able to perform admin-level functions. Click “ALLOW”.
9 OK Goldy add-on is installed and you are notified on how you can use the add-on to manage your Google Workspace users in bulk by simply making changes in the rows and columns of your Google Sheet instead of having to shuffle between different Google Workspace dashboard screens.

10 After installing the add-on, you will need to set it up to be able to use it. It uses various worksheets to enable you to perform various functions on your Google Workspace users in one go. But before that, you will need to create the needed worksheets.

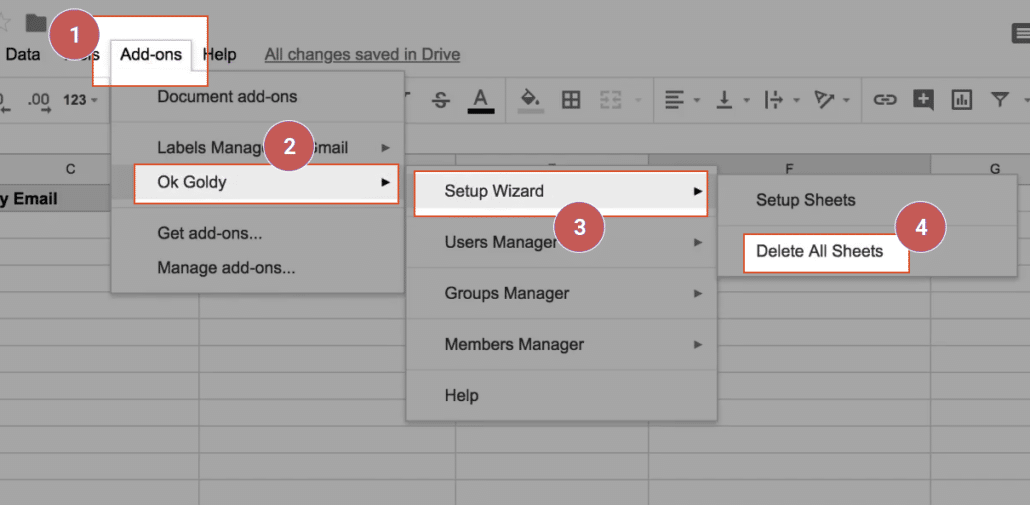
You can click on “Setup Sheets” to create all the needed worksheets or you can click “Delete All Sheets” if you have already created worksheets through OK Goldy.
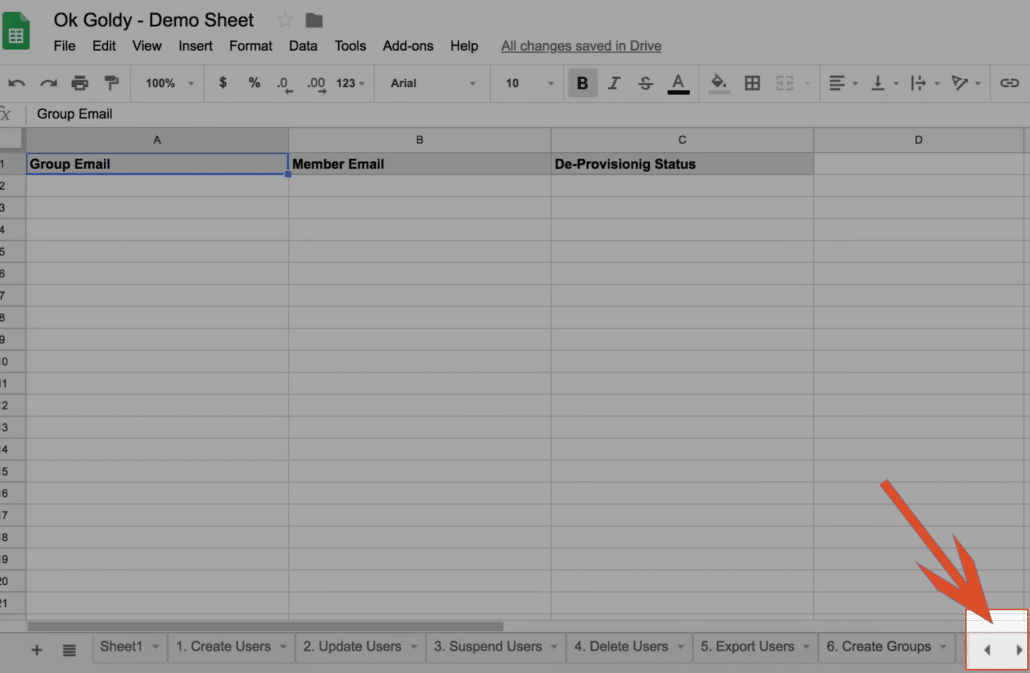
11 Click “Setup Sheets” and you will see at the bottom that all the needed screens are created in different tabs.
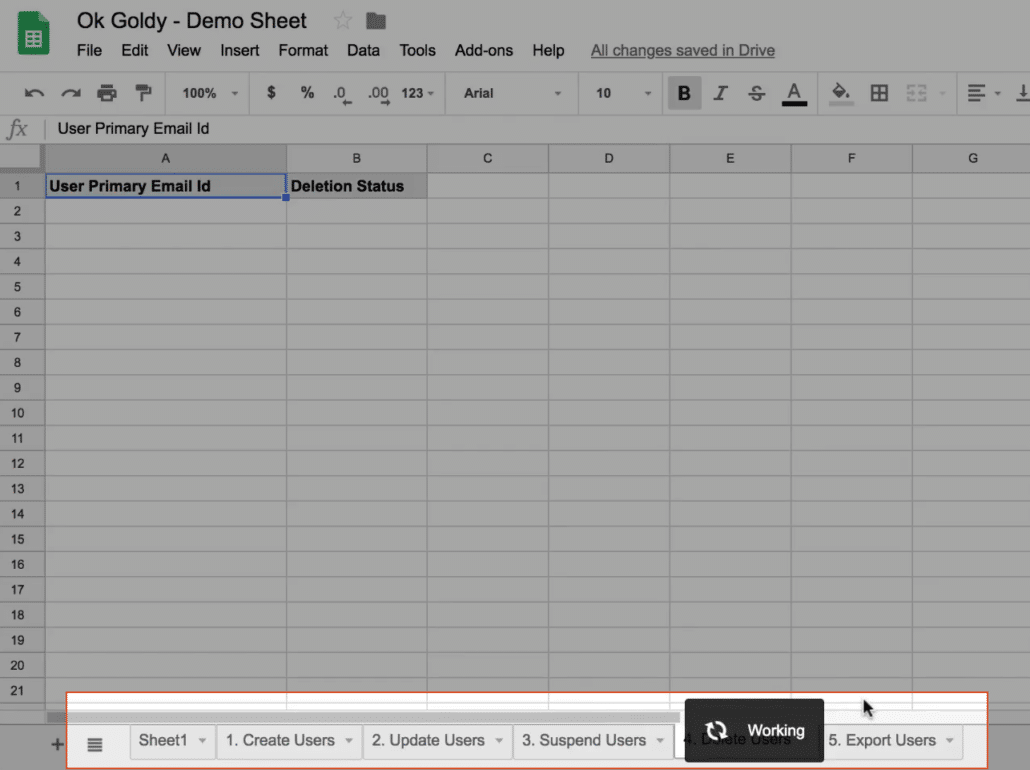
12 You can click on the left and right icons at the bottom-right to view all the worksheets that have been created by OK Goldy.
The purpose of all these sheets is to enable you to perform various functions – in bulk – using the OK Goldy Google Sheets add-on.
For example, if you need to create users in your Google Workspace account, you can simply use the “Create Users” sheet by entering the data in that sheet (explained in a different tutorial).
Need to delete the sheets to start all over again? This is the sequence that you can follow…
Do check out our other tutorials on how you can perform various user-management functions as a Google Workspace administrator, using the OK Goldy add-on for Google Workspace.
Related Posts
....


